ARTICLES
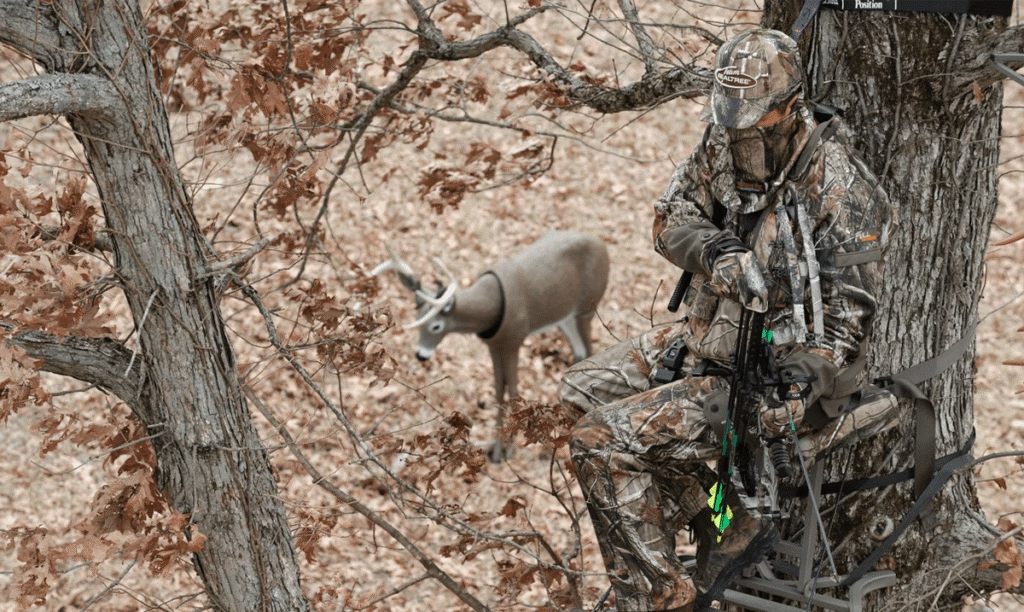
H
U
N
T
I
N
G
RELATED ARTICLES
How to Read Topographic Maps for Deer Hunting
Topographic maps (topo maps) can be a secret weapon for turning a planned hunting trip into a successful harvest. Topo maps will help you find pinch points, funnels and hidden bedding areas that will help guide your hunt. In this guide, we'll cover contour lines, mapping strategies and essential terrain features so you can plan smarter, stealthier hunts and zero in on high-probability zones. Whether you're a novice still learning the ways of the woods or a seasoned hunter fine-tuning your strategy, mastering topographic maps will help turn the odds in your favor next time you're in the field.
Helpful Topo Map Features for Scouting Deer
Contour Lines
Contour lines are the lifeblood of a topographic map. Elevation dictates nearly all hunt-planning considerations: wind, access, thermals and more. Each contour line represents a specific height above sea level, and the vertical distance between adjacent lines - or the contour interval - tells you how much elevation changes. Lines packed tightly together indicate steep slopes or cliffs, while widely spaced lines reveal gentle inclines and flats. By identifying the darker, labeled contours and counting the lighter intermediate lines, you can visualize ridge tops, saddles and valley bottoms - key terrain features that influence deer movement and stand placement.
 The top image is a traditional satellite view, the middle image is a "hybrid" view, where contour lines are overlayed a satellite image. The bottom view is a traditional topographic map.
Map Scale and Ratio
A map's scale defines how distances on the paper translate to real‐world ground distances. A ratio scale (also called a fractional scale) expresses this relationship numerically; 1:24,000 means that one unit on the map corresponds to 24,000 of the same units on the ground. Measure the map distance (in inches or centimeters) and multiply by the ratio to get the actual distance (for example, 2 inches × 24,000 = 48,000 inches or 4,000 feet). A bar scale (graphical scale), on the other hand, presents a drawn line segmented into real‐world units, miles or kilometers, that you can directly compare against a ruler or the map's edge. Because a bar scale retains accuracy if the map is enlarged or reduced, it offers an easier way to gauge distances in the field.
Legends and Symbols
A map's legend is the decoder ring for every symbol, line style and color you see on a topo map. It tells you which squiggly blue line represents a perennial stream, which dashed line marks an unmaintained trail and what shade of green denotes dense timber versus open meadow. By consulting the legend, you transform abstract icons into real-world features, such as waterholes, ridgelines, logging roads, fences and even deer food plots. Cross‑referencing the legend with the terrain prevents mistaking a swamp for a hayfield or a faint game trail for a logging road, keeping you oriented and confident when planning your hunt.
Finding Key Terrain Features
Ridges and Saddles
On a topo map, ridges appear as elongated "U" or "V" shaped contour lines whose closed ends point downhill, marking the crest of high ground. Saddles show as gentle dips between two peaks, where contour lines squeeze into an hourglass or figure-eight shape before opening back up. Deer favor ridgelines for the ease of travel and concealed routes they offer and use saddles as natural funnels between these high-ground travel highways. By tracing ridges and spotting adjacent saddles, you reveal pinch-points where deer are most likely to pass. Overlay aerial imagery or hike in to find worn trails and thick cover to confirm these travel corridors. Positioning your stand at a saddle's narrow point or right on a ridge crest intersection places you in their path and gives you a tactical advantage.
 The above image is a great example of both a ridge and a saddle. You can see the two higher points on the left and right dip and narrow to form a saddle in the middle.
Valleys, Draws and Drains
On a topo map, valleys show up as "U" or "V" shaped contour patterns pointing uphill, marking channels where water gathers and flows. Draws are narrower, steeper channels with tightly packed contours that feed into larger valleys. These low-ground routes offer deer water, cover, shade and energy-efficient travel through rugged terrain. By tracing valleys and draws, you uncover the natural highways deer prefer, especially where multiple small draws funnel into a bigger bottomland. Use aerial imagery or elevation overlays to confirm pinch points and bedding areas along these corridors. With these tips, you can pinpoint high-traffic zones at junctions where a draw spills into a valley or meets a ridge saddle. Positioning a stand or blind at these intersections, with wind and light in your favor, creates a targeted hunting setup.
 The draw shown here can be seen both via satellite and on the topo map. In arid climates, the exposed dirt and shade from the steep banks create cool spots of dirt for deer to bed in.
Pinch Points and Natural Travel Routes
Deer instinctively gravitate toward the landscape's natural chokepoints; narrow saddles between ridges, tight draws carved by streams or slim strips of cover bordering open fields because they conserve energy and stay concealed. These pinch points concentrate movement much like a bottleneck funnels water, guiding deer along the easiest, most sheltered path. By methodically mapping these funnels and linking them to broader corridors such as creek bottoms, ridge trails, field edges or old logging roads, you transform a large area into a handful of high-traffic hotspots. Aerial imagery and topographic maps reveal the subtle rises and falls in terrain, while on-the-ground scouting confirms worn trails, rubs and scrapes. Once you've connected the dots, you will see how a wide travel area near a potential ambush location forces deer into a smaller gap, channeling deer into predictable, repeatable pathways.
With chokepoints and corridors in hand, you can shrink acres of dense cover into a pinpointed hunting zone. Position your stand at the intersection where a dry run meets a ridge saddle or where an ag-field's edge narrows downwind of thick cover. Factor in prevailing wind directions, daily light angles and seasonal shifts in deer behavior, and you've found the sweet spot. Once you're on location, you'll know precisely where a buck is most likely to appear, long before he steps into your shooting lane.
") When cover is limited, intersecting lines of cover create natural pinch points.
When cover is limited, intersecting lines of cover create natural pinch points.
Water Sources
Water holes, whether a spring-fed pond, a winding creek or the edge of a seasonal swamp, are deer magnets year-round. On a topo map they're always marked in blue, often positioned between wider, gently sloping contours that reveal basins or drainage bottoms. Look for V-shaped contour intersections pointing upstream; they signal the flow feeding that pond or creek. These wet spots usually sit between benches and draws where deer pause to graze before and after drinking.
Beyond simply pinpointing the water source, study the terrain that funnels deer in. Thick draws or ravines on one side and low benches on the other create natural travel corridors, while adjacent ridges offer perfect concealment for a stand. Remember, deer don't want to expend more energy than necessary and will often choose the path of least resistance. Pay close attention to wind patterns: a breeze rolling off the water can lift your scent into a draw or carry it uphill, so position yourself downwind with clear sightlines down the slope. Overlay satellite imagery when possible, since game trails often converge on these spots. By combining contour analysis, wind direction and satellite mapping, you'll transform a basic water hole into a high-confidence ambush spot.
 Water holes will appear on traditional topo maps highlighted in blue. This is true for both standing and running water.
Analyzing Deer Behavior and Habitat
Bedding Areas
Bedding areas are harder to spot directly on a topo map, so combine map reading with general knowledge of deer behavior. Typically, deer like to bed on north-facing slopes in the summer to stay cool and south-facing slopes in the winter to stay warm. Bucks and does often bed separately, with bucks tending to go deeper into cover and farther from food. Areas with thick ground cover and multiple escape routes are preferred because they offer security and browse under a lower, sheltered canopy.
Common areas include recently logged locations, where the tops of harvested trees combined with extra sunlight reaching the forest floor provide growth and cover. On public land or unmanaged properties, look for thick swampy areas, areas with lots of fallen trees and ridges with slopes facing in optimal directions. In hilly regions, deer often bed on the downwind side of a ridge or slope. This way, they can use their sense of smell to detect any threats from behind them while using their eyesight to stay alert downhill.
 The northern ridge showcases several great bedding locations, high ridges with southwestern exposure, directly adjacent to a food source and with cover to escape towards in three directions.
Feeding Zones
Knowing where deer bed is only half the battle. To really up your success rate, you need to trace their post-bed routines and intercept them along well-worn travel routes. First, identify the general direction deer leave their bedding areas at dawn and dusk, usually toward reliable food or water sources. Then, use your topo map to find the natural funnels and corridors they're most likely to use, such as saddles between two ridges, small draws that connect a hollow to a flat bench or the edge of thick cover.
Feeding areas vary dramatically by region and season. On your topographic map, search for sections where contour lines spread wide and flatten out, which indicate benches or terraces where deer can graze with minimal effort. These flats are often marked with a green vegetation symbol, but don't rely on that alone. Overlay aerial imagery or satellite views to confirm food types: low grasses, brushy browse or planted food plots. Notice how these flat benches usually sit just below or above steeper slopes, offering quick escape routes back into cover when danger approaches.
Beyond open grazing flats, deer gravitate toward high nutritional-value forages. Look for clusters of mast-producing trees; oaks, hickories, beeches or areas marked by fruit symbols that signal apple, crabapple or persimmon stands. On the edges of agricultural fields, you'll find early-season greens in alfalfa, clover or oats, shifting to corn and soybeans in late summer and fall. By linking bedding zones to these feeding hotspots with your contour-line analysis, you can position your stand or blind where deer travel from bedding to food, giving you a clear, wind-safe ambush point and the element of surprise.
 The following is a great example of a "staging plot", or a small food plot where deer first enter in the evening prior to moving to destination food sources such as large agricultural fields.
Route Planning and Stand Placement
Selecting Access Points
Identifying the perfect entry route on a topographic map is part instinct, part science. Unlike defined game trails, access points depend on shifting elements such as wind direction, precipitation, cloud cover and deer habits. Your goal is simple: slip in undetected, keeping the wind in your favor and your silhouette hidden from sharp eyes and keen noses.
Begin by plotting the prevailing wind against the deer's approach path. On the map, tightly spaced contour lines reveal steep slopes you can hug to break line of sight. Saddles, the low connections between two high points, act as natural funnels for wind, channeling air away from the deer's direction while giving you a shallow depression to move through. Draws and small ravines offer similar cover, especially when you enter from below the top of the bank, where you stay below the horizon.
Weather factors can tip the balance toward a noiseless approach. Rain, fog or low cloud cover quiets footsteps and conceals movement against a grey sky. Match these conditions to the terrain: terraces and benches tucked beneath ridges are less likely to draw a deer's attention, yet they position you downwind of major travel corridors. By factoring wind, weather and contour-line analysis, you'll pinpoint access points that maximize stealth and minimize detection, setting the stage for the perfect ambush.
Wind Direction
Deer rely on their noses more than any other sense, especially mature bucks that can smell danger from hundreds of yards away. By mastering how air moves through the landscape, you can turn your scent into an ally instead of a giveaway.
Before you head into the field, analyze where deer originate and where they're headed on your topo map. Then ask yourself:
- What is the prevailing wind during your hunt?
- How will morning and afternoon thermals shape your scent cone?
- Could deer slip in behind you with a shifting breeze?
Tightly spaced contour lines mark steep ridges and hillsides that become natural windbreaks. Position yourself on the downwind side so your scent rides over the crest and dissipates above the deer's path. Small draws, ravines and creek bottoms work like scent funnels at dusk, pulling cooler air and your odor downward and away from your stand.
Thermals shift with the sun. In the morning, cold air settles into low spots, rising over ridgelines as the sun warms the slopes. Plan a stand on the ridge top's sheltered, downwind slope, so your scent lifts and drifts away at first light. By late afternoon, those same ridges channel cooler air back into draws and hollows, creating a natural barrier between you and passing deer. This information will also help you determine if certain locations are better for morning or evening hunts.
Combine wind-direction data with contour-line reading and you'll identify entry points and stand locations that maximize cover and minimize scent exposure. With practice, you'll slip into position undetected, leaving deer none the wiser until it's too late.
Putting it All Together
Mastering topographic maps turns acres of confusing terrain into a handful of predictable hunting zones by revealing ridges, saddles, draws, benches, water sources and natural pinch points. Use contour spacing, map scale and legends together with aerial imagery and on‑the‑ground scouting to identify bedding areas, travel corridors and high‑probability ambush sites. Always plan entry routes and stand placement with wind, light and seasonal behavior in mind, and confirm land access and safety before you go. With these skills you convert map study into safer, stealthier hunts and consistently higher odds in the field.
10 Tracking Tips to Help Find Your Deer After the Shot
You shot your deer, but it took off. Now what? Follow these 10 tracking tips to recover your deer and make your hunt a success.
Every deer hunter dreams of the perfect shot-but whether the hit is solid or less than perfect, the work continues after you pull the trigger. Tracking is a skill every hunter must master because recovering your deer is just as important as making the shot.
By Bryce M. Towsley
 Very rarely do deer "drop in their tracks" at the shot. Once you make your shot, stay focused on the deer noting where it was when you fired and the direction it took off in.
Despite what we may see on television, deer usually do not drop in their tracks at the shot. Sometimes, too, "stuff" happens and the shot is less than perfect. That's when you have to unleash your tracking skills and go find them. Here are 10 tried-and-true tracking tips that have served me well over the years in finding deer after the shot.
What Should You Do First After the Shot?
Tip 1. Stay Focused
After the shot, stay as calm as you can and stay focused on the deer. Watch it as long as you can then listen even longer. Often you will hear the deer long after you can't see it anymore.
Before you leave your stand, pick a clear landmark where you last saw the deer and another where you last heard the deer. Also, pick a landmark noting where the deer was when you shot. Have these landmarks firmly in your mind before you exit your stand. If you have a compass, take a bearing to each of these locations. Snap a few photos with your cell phone or use a small notepad to note the locations or draw yourself a little schematic that shows these three key landmarks.
 Before you leave your stand, use your phone to take a photo of where the deer was standing when you shot and the landmark where you last saw the deer before it disappeared.
Go to where you last saw the deer and look for blood and tracks. Remember to look on the bushes as well as on the ground for blood. If you fail to find any, go to spot where you shot the deer and search for blood and/or hair. If you still don't find a blood trail of any kind, go back to your stand and double check to make sure you were looking in the right places.
Next, start where you last saw the deer and walk to the location where you last heard the deer. Watch for blood and other sign along the way. Sometimes it takes a while for the blood trail to start.
How Do Blood Color and Clues Change Your Game Plan?
Tip 2. First Blood
When you find blood, note its location. Is it high up on the bushes and far out from the trail? That might indicate arterial spurting. Does it seem to be in the center of the tracks, even though you took a broadside shot? That might be lung blood leaking out of the nose and mouth. Is the blood in the track? Maybe it's running down the leg.
Is there green gunk on the ground with a little blood? That's a gut shot. Resist the tendency to keep tracking that deer. Leave quietly and come back in the morning, or at least six hours later. A gut shot deer will lie down very quickly and if you leave it alone, it will die in that bed. Usually it will be relatively close to where you shot it. But if you keep pushing and jump the deer, they can turn into the Terminator, unable or unwilling to die and they can run for miles.
 When looking for a blood trail, heavy signs higher up on bushes or spurts off the trail may indicate arterial bleeding, which means you should find your deer shortly.
Did you find pieces of bone? Trust me, it's not ribs as so many people think; 95% of the time it is pieces of leg bone. You may get that deer, but it's not going to be easy.
A lot of blood at the start that turns into a few drips and then stops in a ¼ mile or so, is usually a low hit in the brisket. You are in for a long day with that deer.
With a leg or brisket hit, the deer is very mobile and will keep moving if pushed. If you can get some help, it's best to place hunters along the escape routes and hope the deer comes by as you track the blood.
How Should You Mark a Faint Blood Trail?
Tip 3. Mark the Way
If the blood trail is tough to follow, mark the blood you found with toilet paper or torn paper towels, so you can easily find it again. Although many people recommend using flagging material, I don't use it. I know you plan to come back and take it all down, but plans rarely work out. Flagging tape lasts a long time in the woods. Paper towels or toilet paper are biodegradable and will disappear rather quickly.
Often, if you line up several pieces of paper you left hanging on branches you can see a clear direction of travel, which is a good place to continue the search if you have lost the blood and tracks.
Why Stepping Off-Trail Protects Critical Sign
Tip 4. Watch Your Step
Take care to walk to the side of the deer trail. You never want to step on the tracks or the blood. You may think you won't need to come back and find them again, but you will probably be wrong. Leave all the sign untrampled.
What to do When the Blood Trail Disappears?
Tip 5. When the Blood Stops
If you lose the blood trail, make wide sweeping circles that start and end at the last place you found blood. Keep your eyes on the ground and miss nothing. If you fail to find the trail, make a bigger circle. Repeat as necessary.
How a Ground-Level View Reveals Hidden Tracks
Tip 6. Get Low
The recent passing of a deer will scuff up the leaves. Older tracks will settle from time and gravity, but a fresh track will show a bit higher. It's usually not noticeable when standing up, but when you get your eyes to ground level you can often see the trail very clearly.
How to Run a Systematic Grid to Recover Deer?
Tip 7. When All Else Fails
A grid search is just what it sounds like. Divide the land into a giant grid, just like on graph paper. The lines should be close together so that no part of the land is unseen. Walk along these imaginary lines one by one until you find the deer, or some sign of the deer, or have walked the entire grid.
 If you simply cannot find a blood trail of any kind, divide the land where you last saw the deer into a grid and walk each grid point until you find the deer or a sign of its trail.
In that case, expand the grid and repeat. Look under every bush and in every brush pile. A mortally wounded deer will often crawl under cover and will die there.
What Lighting Works Best for Night Tracking?
Tip 8. Light the Way
You have no doubt read that when tracking at night, a Coleman lantern, "makes blood glow like neon." The lantern does show blood a bit better than a conventional flashlight, but it's always been a disappointment to me when I have used one. Besides, who has a Coleman lantern in their backpack?
A quality flashlight will show blood like its electrified. It's a good idea to have one in your pocket or backpack when hunting.
Where Would a Wounded Deer Go?
Tip 9. Become the Deer
Walk along while thinking, "If I were a wounded deer, which way would I go?" Just follow your instincts. You may have to return to the last sign and strike out in another direction a few times, but sooner or later the odds are you will find a new spot of blood or identifiable track and you'll be back in the game.
Can Intuition and Terrain Flow Lead You to Your Deer?
Tip 10. Turn Off Your Brain
Another approach is to turn off your brain and just walk. Let the terrain and vegetation guide your feet. Deer and other animals will take the path of least resistance and if you walk in a "Zen" state, going with the flow, you will find you do the same thing.
Once you get in tune with the woods, things like that just happen in the back of your mind. If you try to think about it too much, you screw it up, but if you just let the reptilian part of your brain operate then eons of evolution are suppressed and the caveman in you will come out of hiding and turn you into a creature of the woods, just like the deer. I know this may sound a bit too "new age," but I have found several animals we thought were hopeless using this technique.
How to Read the Land for Deer Hunting in Different TerrainsTracking with Technology
I used a thermal imaging unit in Zimbabwe a few years ago to watch for lions while the PH and trackers cut up a buffalo I had shot just before dark. Back then they were very expensive. Today, there are several affordable units designed for tracking.
 Photograph Courtesy of Leupold® & Stevens, Inc.
I have been using a Leupold LTO Quest. This is their entry-level unit and it has a camera and flashlight built in with the thermal sensor. Leupold claims the LTO Quest can detect heat signatures out to 300 yards. Deer season is closed as I am writing this, so I am finding alternatives to test it with. It easily can find my dogs even when they are out some distance.
I couldn't find a blood donor to help with the test, so I spit on my walkway on a cool night. The unit could easily see it, even after several minutes. This unit is sensitive enough that when I stood on my deck in my socks, the unit could detect my foot prints for several minutes after.
This technology may well be a game changer for tracking and finding wounded deer in the years ahead.
Conclusion
Recovering a deer after the shot isn't just about skill-it's about patience, persistence, and respect for the animal. By staying calm, reading sign carefully, and knowing when to push forward or back out, you dramatically increase your odds of success.
Remember: every track tells a story. Learn to read it, and you'll not only recover more deer but also deepen your connection with the hunt itself.
About the Author
Bryce M. Towsley has been writing about guns for 36 years and has published thousands of articles in most of the major firearms magazines. He has hunted all over the world and is a competition shooter in several disciplines. Towsley has several books available on guns, shooting and hunting as well as an adventure novel, The 14th Reinstated. Signed books are available on his website.

Bryce Towsley
Quick Takeaways: Tracking a Deer After the Shot
Stay calm Read the blood Be patient Follow all sign Stay calmMark the exact spot of impact before leaving your stand.
Read the bloodcolor and consistency reveal where the deer was hit.
Be patientRushing can push a wounded deer farther away.
Follow all signTracks, broken brush and scuffed leaves all tell the story.
FAQ: Common Deer Tracking Questions
Even experienced hunters run into tracking challenges after the shot. These quick answers cover the most common questions about when to follow, how to read sign and what to do when the trail goes cold.
How soon should I start tracking after shooting a deer? ExpandThis can vary depending on shot placement. If the downed deer is in sight and you are sure you made an accurate heart or lung shot, you can begin your cautious approach shortly after the shot, keeping your eyes on the deer.
If the deer is not in sight, you should wait 30 minutes to an hour before beginning to track.
What's the easiest way to find first blood? Expand
Start at the point of impact and look for hair, disturbed soil, or leaves with tiny blood droplets.
What should I do if I lose the blood trail? ExpandReturn to the last sign and begin making slow, wide circles until you pick it up again. If needed, switch to a grid search in thick cover.
What's the most common mistake hunters make after the shot? ExpandPushing too soon. A wounded deer can travel much farther if pressured. Waiting and reading the sign carefully increases recovery success.
Deer Hunting Strategies
Field to Fork: Venison Recipes
Venison is lean, healthy, and full of flavor. From simple burgers and chili to roasts and stews, it's a versatile meat that turns your harvest into delicious meals for family and friends.

Smoked Venison Meatloaf Recipe
Everyone needs a little comfort food from time to time, and meatloaf definitely fits the bill.
Read more
BBQ Venison and Sauerkraut Sandwiches
These quick and easy BBQ sandwiches are perfect for a quick venison meal.
Read more
Stuffed Shells with Venison Meat Sauce
This Stuffed Shells with Venison Meat Sauce recipe will hit the spot.
Read moreCelebrate National Hunting & Fishing Day
National Hunting and Fishing Day is this Saturday, September 27, and NSSF, as founder and now a major sponsor, encourages all sportsmen and sportswomen to participate.
READ MORE
Celebrating National Hunting and Fishing Day!
On the fourth Saturday of every September, NHF Day recognizes generations of sportsmen and women for their contributions to the conservation of our nation’s rich sporting heritage and natural resources. One of the main goals of National Hunting and Fishing Day is to recruit new hunters and anglers by encouraging participation and increasing public awareness of the connection between hunting, angling, and conservation. Through self-imposed fees and excise taxes, sportsmen and women have raised more than $57 billion--that’s more than $100,000 every 30 minutes being raised for conservation. Now in its 52nd year, NHF Day is the largest, most effective grassroots movement ever undertaken to promote outdoor sports and conservation. Launched by Congress in 1971 and heavily promoted by NSSF for decades, NHF Day is now administered by Wonders of Wildlife Museum and has consistently recognized hunters and anglers for their leadership in wildlife and conservation. Find national, state, regional and local organizations hosting related events.Get Started
Hunting, Fishing, and Shooting Sports are not just great American pastimes – they are the very foundation that supports the model of wildlife conservation created more than a century ago in this country. By introducing new audiences to these activities, we ensure that wildlife and wild places will be protected for generations to come. Hunting is a useful and beneficial wildlife management tool that ensures and maintains the health and abundance of game species and the balance of our natural resources. There are a number of species, from upland birds to big game animals to hunt. Learn more about these species from game bird and game animal organizations.Take the Pledge
Take the pledge and submit a photo of you engaging in outdoor activities like hunting, fishing, or shooting to be entered to win one of 20 Bass Pro Shops gift cards ranging from $50 up to $500!Share Your Images
Upload an image of you hunting, fishing or target shooting and tag @NHFday on social media using the hashtag #GuideToOutside or Upload an image to be featured here!Pull The Trigger Newsletter
SIGN UP FOR MONTHLY UPDATES