Topographic maps (topo maps) can be a secret weapon for turning a planned hunting trip into a successful harvest. Topo maps will help you find pinch points, funnels and hidden bedding areas that will help guide your hunt. In this guide, we'll cover contour lines, mapping strategies and essential terrain features so you can plan smarter, stealthier hunts and zero in on high-probability zones. Whether you're a novice still learning the ways of the woods or a seasoned hunter fine-tuning your strategy, mastering topographic maps will help turn the odds in your favor next time you're in the field.
Helpful Topo Map Features for Scouting Deer
Contour Lines
Contour lines are the lifeblood of a topographic map. Elevation dictates nearly all hunt-planning considerations: wind, access, thermals and more. Each contour line represents a specific height above sea level, and the vertical distance between adjacent lines - or the contour interval - tells you how much elevation changes. Lines packed tightly together indicate steep slopes or cliffs, while widely spaced lines reveal gentle inclines and flats. By identifying the darker, labeled contours and counting the lighter intermediate lines, you can visualize ridge tops, saddles and valley bottoms - key terrain features that influence deer movement and stand placement.

The top image is a traditional satellite view, the middle image is a "hybrid" view, where contour lines are overlayed a satellite image. The bottom view is a traditional topographic map.
Map Scale and Ratio
A map's scale defines how distances on the paper translate to real‐world ground distances. A ratio scale (also called a fractional scale) expresses this relationship numerically; 1:24,000 means that one unit on the map corresponds to 24,000 of the same units on the ground. Measure the map distance (in inches or centimeters) and multiply by the ratio to get the actual distance (for example, 2 inches × 24,000 = 48,000 inches or 4,000 feet). A bar scale (graphical scale), on the other hand, presents a drawn line segmented into real‐world units, miles or kilometers, that you can directly compare against a ruler or the map's edge. Because a bar scale retains accuracy if the map is enlarged or reduced, it offers an easier way to gauge distances in the field.
Legends and Symbols
A map's legend is the decoder ring for every symbol, line style and color you see on a topo map. It tells you which squiggly blue line represents a perennial stream, which dashed line marks an unmaintained trail and what shade of green denotes dense timber versus open meadow. By consulting the legend, you transform abstract icons into real-world features, such as waterholes, ridgelines, logging roads, fences and even deer food plots. Cross‑referencing the legend with the terrain prevents mistaking a swamp for a hayfield or a faint game trail for a logging road, keeping you oriented and confident when planning your hunt.
Finding Key Terrain Features
Ridges and Saddles
On a topo map, ridges appear as elongated "U" or "V" shaped contour lines whose closed ends point downhill, marking the crest of high ground. Saddles show as gentle dips between two peaks, where contour lines squeeze into an hourglass or figure-eight shape before opening back up. Deer favor ridgelines for the ease of travel and concealed routes they offer and use saddles as natural funnels between these high-ground travel highways. By tracing ridges and spotting adjacent saddles, you reveal pinch-points where deer are most likely to pass. Overlay aerial imagery or hike in to find worn trails and thick cover to confirm these travel corridors. Positioning your stand at a saddle's narrow point or right on a ridge crest intersection places you in their path and gives you a tactical advantage.

The above image is a great example of both a ridge and a saddle. You can see the two higher points on the left and right dip and narrow to form a saddle in the middle.
Valleys, Draws and Drains
On a topo map, valleys show up as "U" or "V" shaped contour patterns pointing uphill, marking channels where water gathers and flows. Draws are narrower, steeper channels with tightly packed contours that feed into larger valleys. These low-ground routes offer deer water, cover, shade and energy-efficient travel through rugged terrain. By tracing valleys and draws, you uncover the natural highways deer prefer, especially where multiple small draws funnel into a bigger bottomland. Use aerial imagery or elevation overlays to confirm pinch points and bedding areas along these corridors. With these tips, you can pinpoint high-traffic zones at junctions where a draw spills into a valley or meets a ridge saddle. Positioning a stand or blind at these intersections, with wind and light in your favor, creates a targeted hunting setup.

The draw shown here can be seen both via satellite and on the topo map. In arid climates, the exposed dirt and shade from the steep banks create cool spots of dirt for deer to bed in.
Pinch Points and Natural Travel Routes
Deer instinctively gravitate toward the landscape's natural chokepoints; narrow saddles between ridges, tight draws carved by streams or slim strips of cover bordering open fields because they conserve energy and stay concealed. These pinch points concentrate movement much like a bottleneck funnels water, guiding deer along the easiest, most sheltered path. By methodically mapping these funnels and linking them to broader corridors such as creek bottoms, ridge trails, field edges or old logging roads, you transform a large area into a handful of high-traffic hotspots. Aerial imagery and topographic maps reveal the subtle rises and falls in terrain, while on-the-ground scouting confirms worn trails, rubs and scrapes. Once you've connected the dots, you will see how a wide travel area near a potential ambush location forces deer into a smaller gap, channeling deer into predictable, repeatable pathways.
With chokepoints and corridors in hand, you can shrink acres of dense cover into a pinpointed hunting zone. Position your stand at the intersection where a dry run meets a ridge saddle or where an ag-field's edge narrows downwind of thick cover. Factor in prevailing wind directions, daily light angles and seasonal shifts in deer behavior, and you've found the sweet spot. Once you're on location, you'll know precisely where a buck is most likely to appear, long before he steps into your shooting lane.
")
When cover is limited, intersecting lines of cover create natural pinch points.
Water Sources
Water holes, whether a spring-fed pond, a winding creek or the edge of a seasonal swamp, are deer magnets year-round. On a topo map they're always marked in blue, often positioned between wider, gently sloping contours that reveal basins or drainage bottoms. Look for V-shaped contour intersections pointing upstream; they signal the flow feeding that pond or creek. These wet spots usually sit between benches and draws where deer pause to graze before and after drinking.
Beyond simply pinpointing the water source, study the terrain that funnels deer in. Thick draws or ravines on one side and low benches on the other create natural travel corridors, while adjacent ridges offer perfect concealment for a stand. Remember, deer don't want to expend more energy than necessary and will often choose the path of least resistance. Pay close attention to wind patterns: a breeze rolling off the water can lift your scent into a draw or carry it uphill, so position yourself downwind with clear sightlines down the slope. Overlay satellite imagery when possible, since game trails often converge on these spots. By combining contour analysis, wind direction and satellite mapping, you'll transform a basic water hole into a high-confidence ambush spot.

Water holes will appear on traditional topo maps highlighted in blue. This is true for both standing and running water.
Analyzing Deer Behavior and Habitat
Bedding Areas
Bedding areas are harder to spot directly on a topo map, so combine map reading with general knowledge of deer behavior. Typically, deer like to bed on north-facing slopes in the summer to stay cool and south-facing slopes in the winter to stay warm. Bucks and does often bed separately, with bucks tending to go deeper into cover and farther from food. Areas with thick ground cover and multiple escape routes are preferred because they offer security and browse under a lower, sheltered canopy.
Common areas include recently logged locations, where the tops of harvested trees combined with extra sunlight reaching the forest floor provide growth and cover. On public land or unmanaged properties, look for thick swampy areas, areas with lots of fallen trees and ridges with slopes facing in optimal directions. In hilly regions, deer often bed on the downwind side of a ridge or slope. This way, they can use their sense of smell to detect any threats from behind them while using their eyesight to stay alert downhill.

The northern ridge showcases several great bedding locations, high ridges with southwestern exposure, directly adjacent to a food source and with cover to escape towards in three directions.
Feeding Zones
Knowing where deer bed is only half the battle. To really up your success rate, you need to trace their post-bed routines and intercept them along well-worn travel routes. First, identify the general direction deer leave their bedding areas at dawn and dusk, usually toward reliable food or water sources. Then, use your topo map to find the natural funnels and corridors they're most likely to use, such as saddles between two ridges, small draws that connect a hollow to a flat bench or the edge of thick cover.
Feeding areas vary dramatically by region and season. On your topographic map, search for sections where contour lines spread wide and flatten out, which indicate benches or terraces where deer can graze with minimal effort. These flats are often marked with a green vegetation symbol, but don't rely on that alone. Overlay aerial imagery or satellite views to confirm food types: low grasses, brushy browse or planted food plots. Notice how these flat benches usually sit just below or above steeper slopes, offering quick escape routes back into cover when danger approaches.
Beyond open grazing flats, deer gravitate toward high nutritional-value forages. Look for clusters of mast-producing trees; oaks, hickories, beeches or areas marked by fruit symbols that signal apple, crabapple or persimmon stands. On the edges of agricultural fields, you'll find early-season greens in alfalfa, clover or oats, shifting to corn and soybeans in late summer and fall. By linking bedding zones to these feeding hotspots with your contour-line analysis, you can position your stand or blind where deer travel from bedding to food, giving you a clear, wind-safe ambush point and the element of surprise.

The following is a great example of a "staging plot", or a small food plot where deer first enter in the evening prior to moving to destination food sources such as large agricultural fields.
Route Planning and Stand Placement
Selecting Access Points
Identifying the perfect entry route on a topographic map is part instinct, part science. Unlike defined game trails, access points depend on shifting elements such as wind direction, precipitation, cloud cover and deer habits. Your goal is simple: slip in undetected, keeping the wind in your favor and your silhouette hidden from sharp eyes and keen noses.
Begin by plotting the prevailing wind against the deer's approach path. On the map, tightly spaced contour lines reveal steep slopes you can hug to break line of sight. Saddles, the low connections between two high points, act as natural funnels for wind, channeling air away from the deer's direction while giving you a shallow depression to move through. Draws and small ravines offer similar cover, especially when you enter from below the top of the bank, where you stay below the horizon.
Weather factors can tip the balance toward a noiseless approach. Rain, fog or low cloud cover quiets footsteps and conceals movement against a grey sky. Match these conditions to the terrain: terraces and benches tucked beneath ridges are less likely to draw a deer's attention, yet they position you downwind of major travel corridors. By factoring wind, weather and contour-line analysis, you'll pinpoint access points that maximize stealth and minimize detection, setting the stage for the perfect ambush.
Wind Direction
Deer rely on their noses more than any other sense, especially mature bucks that can smell danger from hundreds of yards away. By mastering how air moves through the landscape, you can turn your scent into an ally instead of a giveaway.
Before you head into the field, analyze where deer originate and where they're headed on your topo map. Then ask yourself:
- What is the prevailing wind during your hunt?
- How will morning and afternoon thermals shape your scent cone?
- Could deer slip in behind you with a shifting breeze?
Tightly spaced contour lines mark steep ridges and hillsides that become natural windbreaks. Position yourself on the downwind side so your scent rides over the crest and dissipates above the deer's path. Small draws, ravines and creek bottoms work like scent funnels at dusk, pulling cooler air and your odor downward and away from your stand.
Thermals shift with the sun. In the morning, cold air settles into low spots, rising over ridgelines as the sun warms the slopes. Plan a stand on the ridge top's sheltered, downwind slope, so your scent lifts and drifts away at first light. By late afternoon, those same ridges channel cooler air back into draws and hollows, creating a natural barrier between you and passing deer. This information will also help you determine if certain locations are better for morning or evening hunts.
Combine wind-direction data with contour-line reading and you'll identify entry points and stand locations that maximize cover and minimize scent exposure. With practice, you'll slip into position undetected, leaving deer none the wiser until it's too late.
Putting it All Together
Mastering topographic maps turns acres of confusing terrain into a handful of predictable hunting zones by revealing ridges, saddles, draws, benches, water sources and natural pinch points. Use contour spacing, map scale and legends together with aerial imagery and on‑the‑ground scouting to identify bedding areas, travel corridors and high‑probability ambush sites. Always plan entry routes and stand placement with wind, light and seasonal behavior in mind, and confirm land access and safety before you go. With these skills you convert map study into safer, stealthier hunts and consistently higher odds in the field.
 Very rarely do deer "drop in their tracks" at the shot. Once you make your shot, stay focused on the deer noting where it was when you fired and the direction it took off in.
 Before you leave your stand, use your phone to take a photo of where the deer was standing when you shot and the landmark where you last saw the deer before it disappeared.
 When looking for a blood trail, heavy signs higher up on bushes or spurts off the trail may indicate arterial bleeding, which means you should find your deer shortly.
 If you simply cannot find a blood trail of any kind, divide the land where you last saw the deer into a grid and walk each grid point until you find the deer or a sign of its trail.
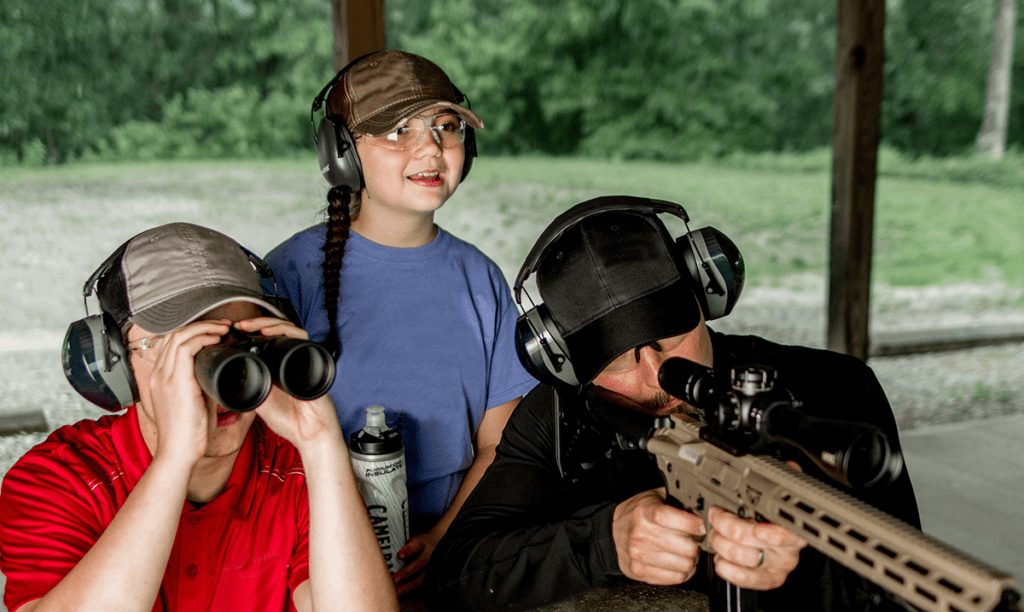
 Photograph Courtesy of Leupold® & Stevens, Inc.