Looking for a fun and inexpensive way to introduce a new hunter to the sport? How about a squirrel hunt? Seasons are long in most states, squirrels abound on most public lands and permission to hunt small game on private land is usually easier to procure than that for popular big-game animals.
The best part? Squirrels are delicious.
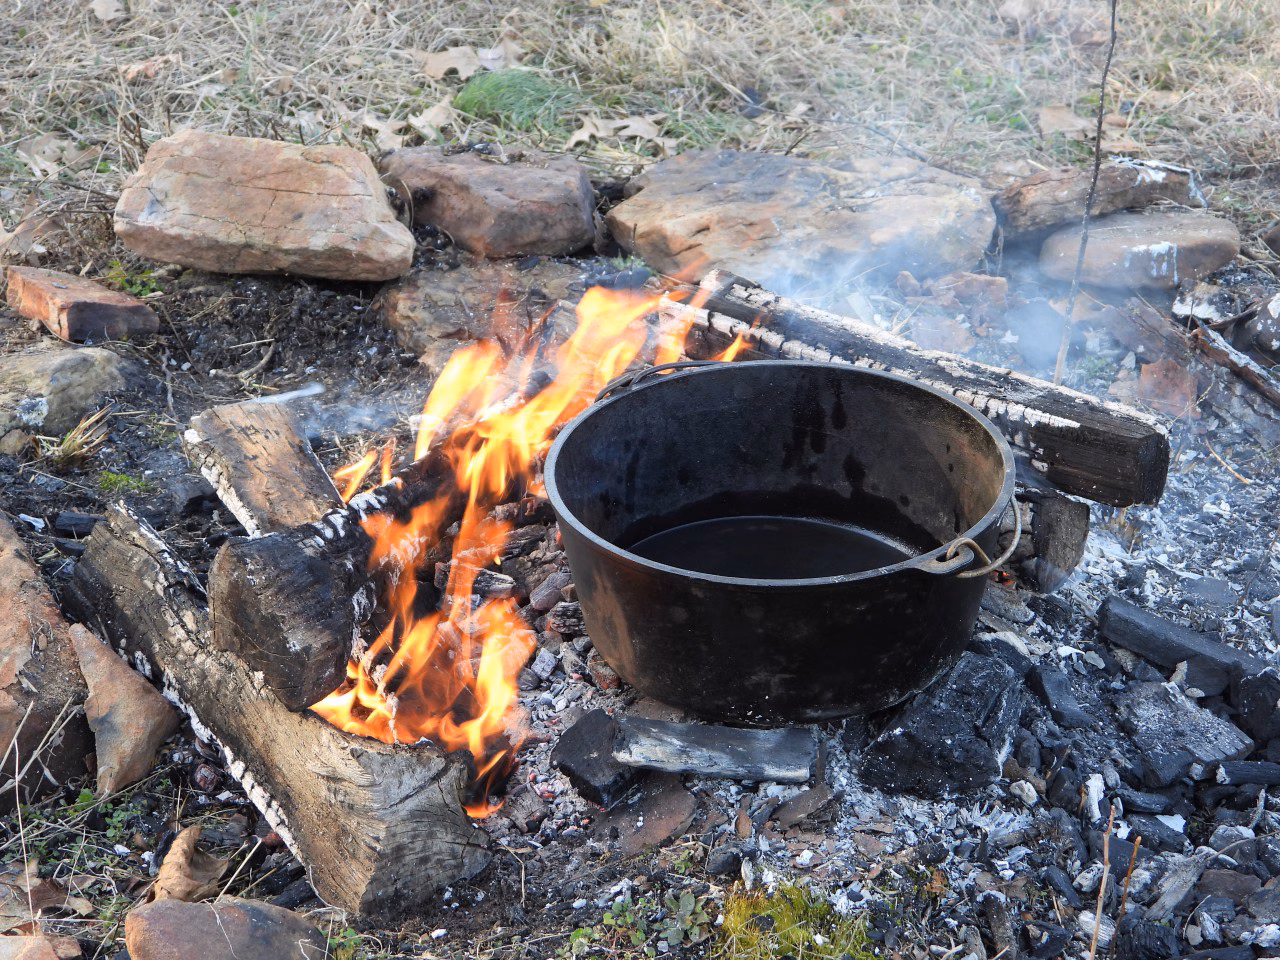
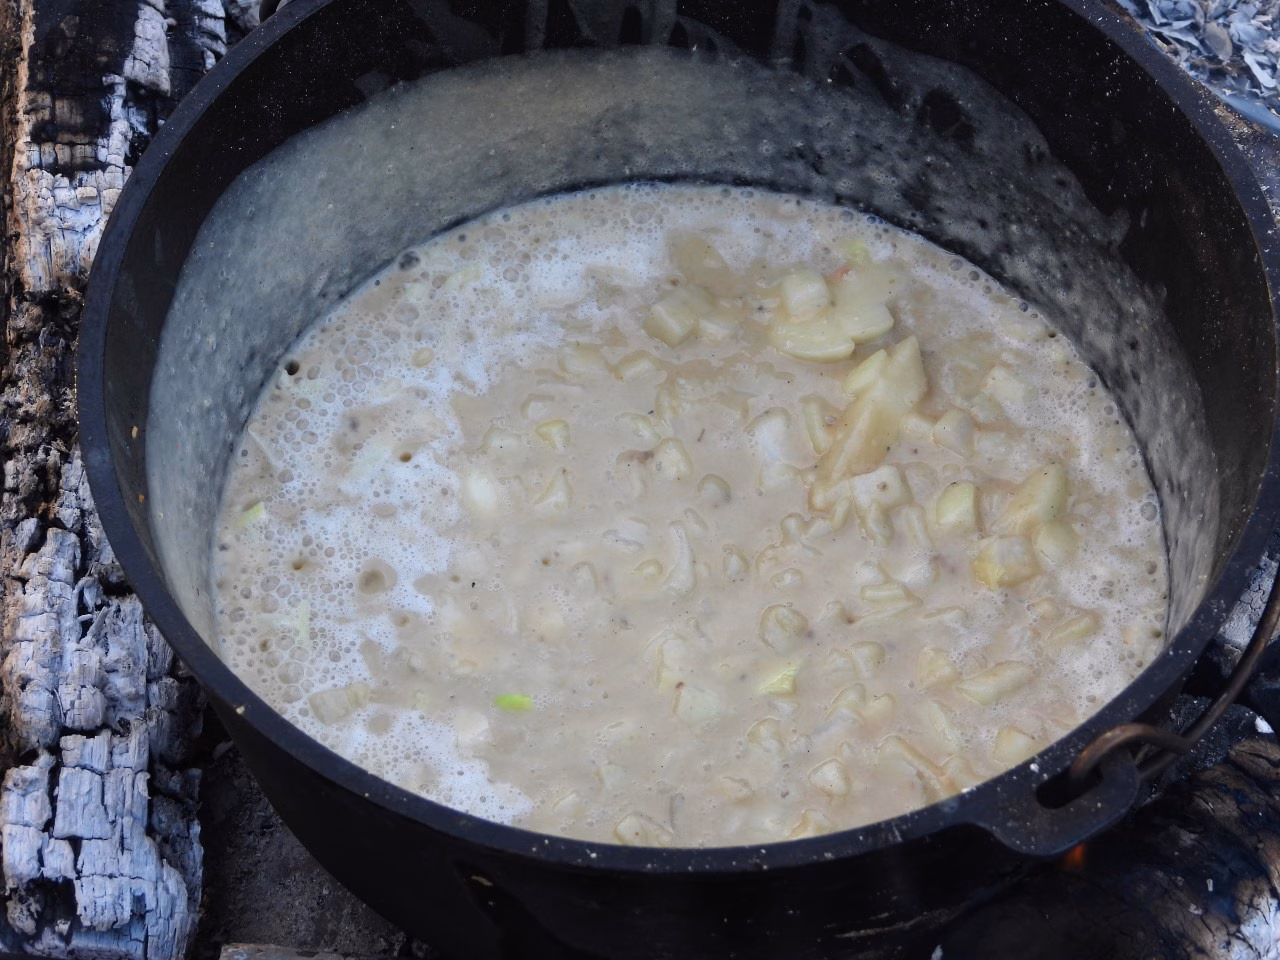
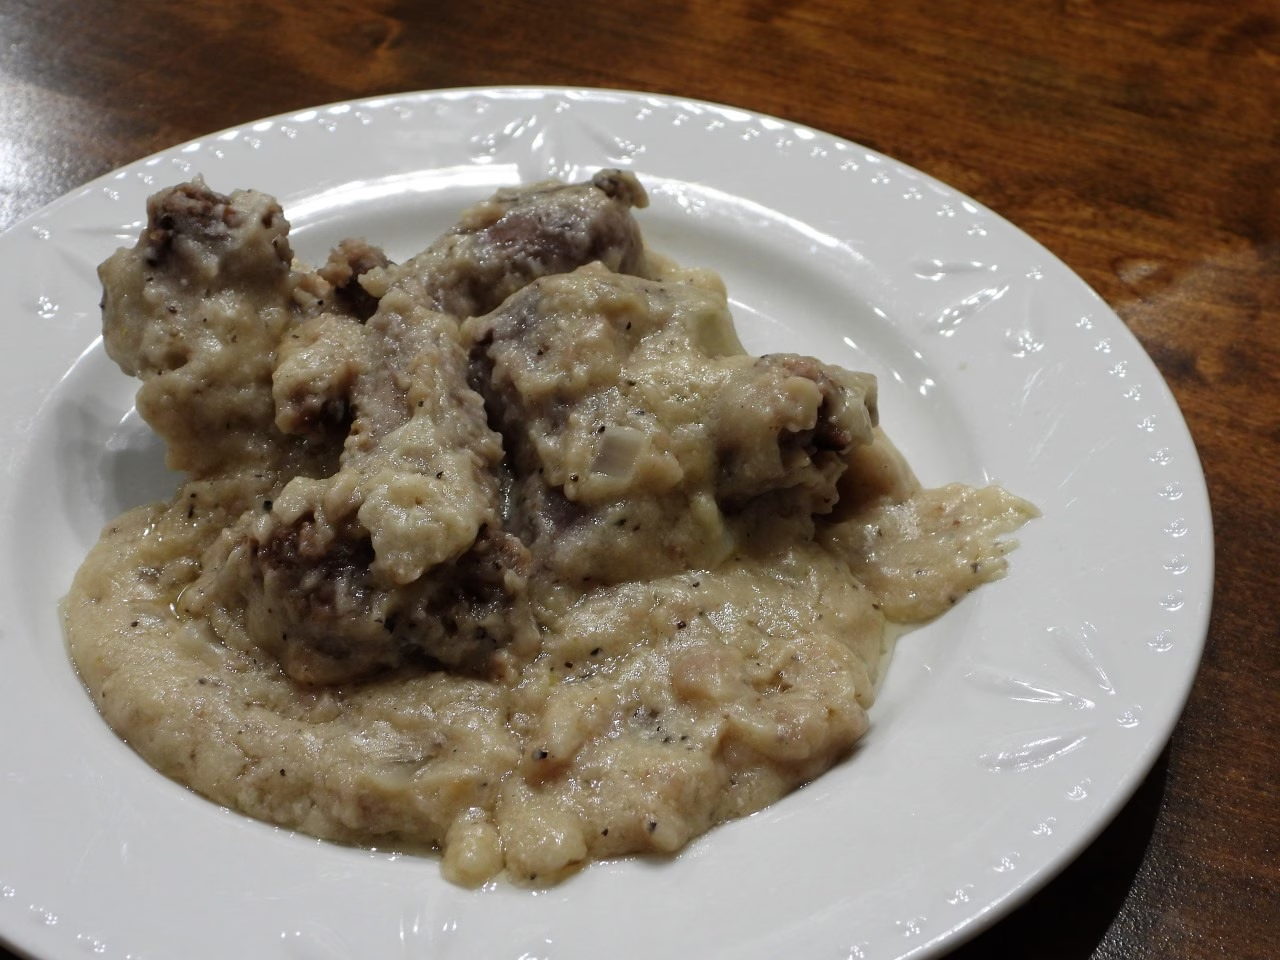
Use a Dutch oven over your evening campfire to cook up the day’s take. If you aren’t camping, this same recipe will work just fine on the stovetop. The slow-cooking process tenderizes the squirrels, making them wonderful to eat.
Ingredients
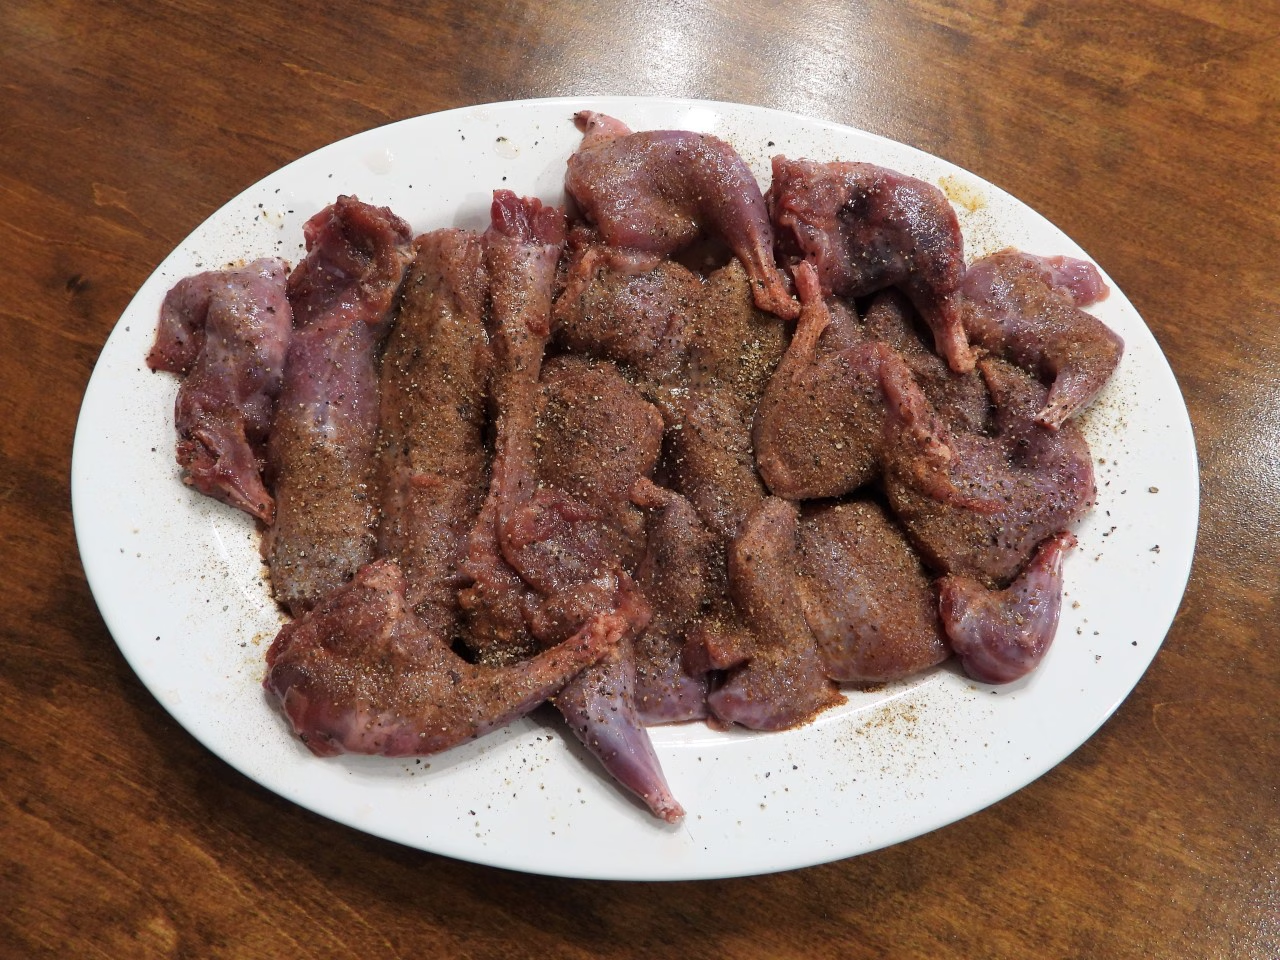
3 gray or two larger fox squirrels, sectioned into leg and back pieces.
1 teaspoon salt
1 teaspoon black pepper
1 teaspoon Cajun seasoning
2 cups all-purpose flour, divided
½-inch oil, shortening, bacon grease or lard in the bottom of a heavy Dutch oven
3 yellow onions, chopped
4 cups milk or buttermilk
2 to 4 cups water, as needed
Salt and pepper to taste
Directions
Start by placing your camp-style (with legs) Dutch oven over eight to 10 coals. Add your oil of choice to a depth of about ½-inch.
While the oil heats, evenly season the squirrel with salt, pepper and Cajun seasoning.
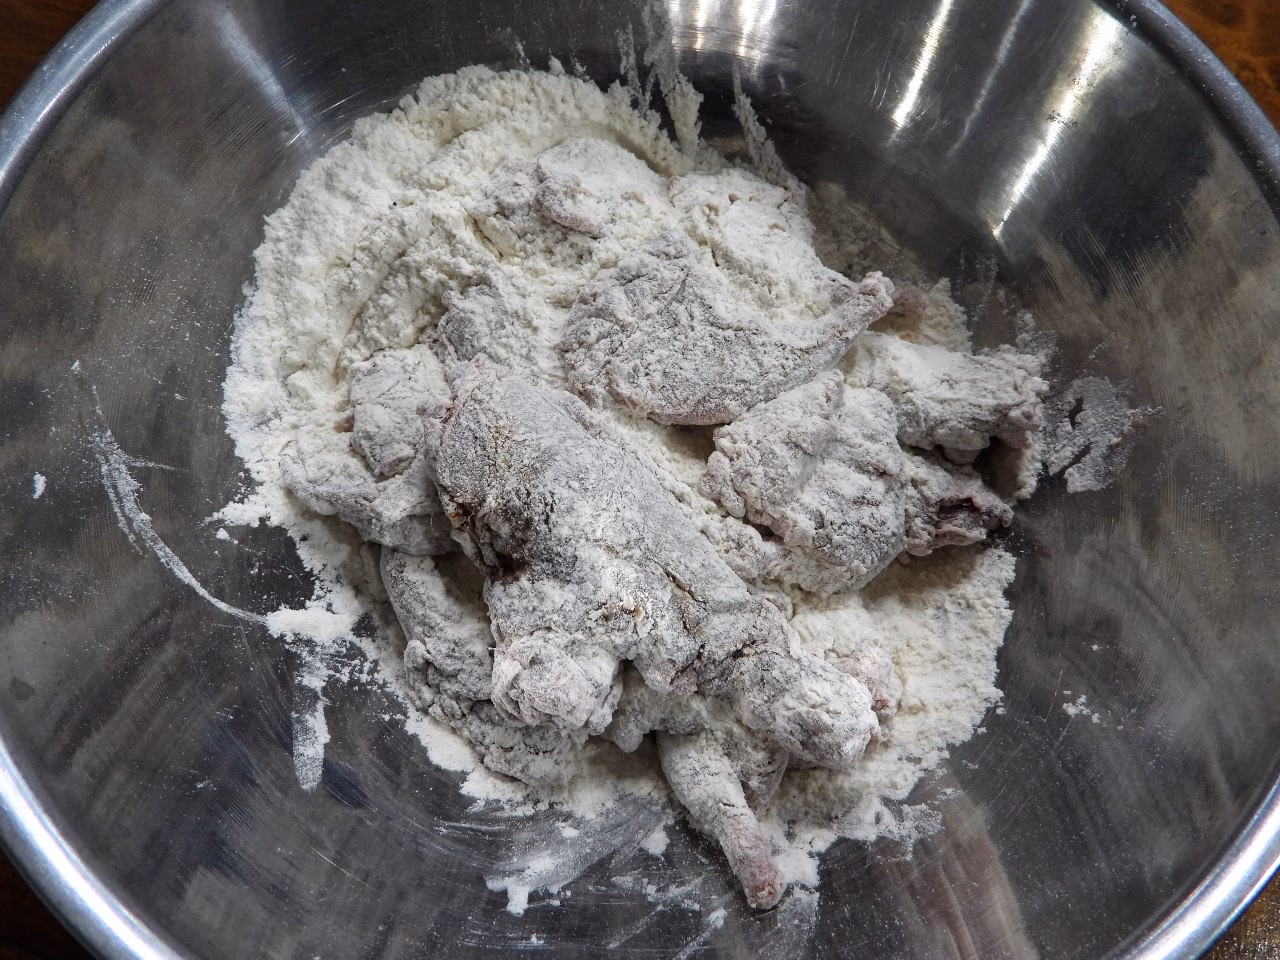
Toss the squirrel pieces in one cup of flour to evenly coat the surface of the meat.
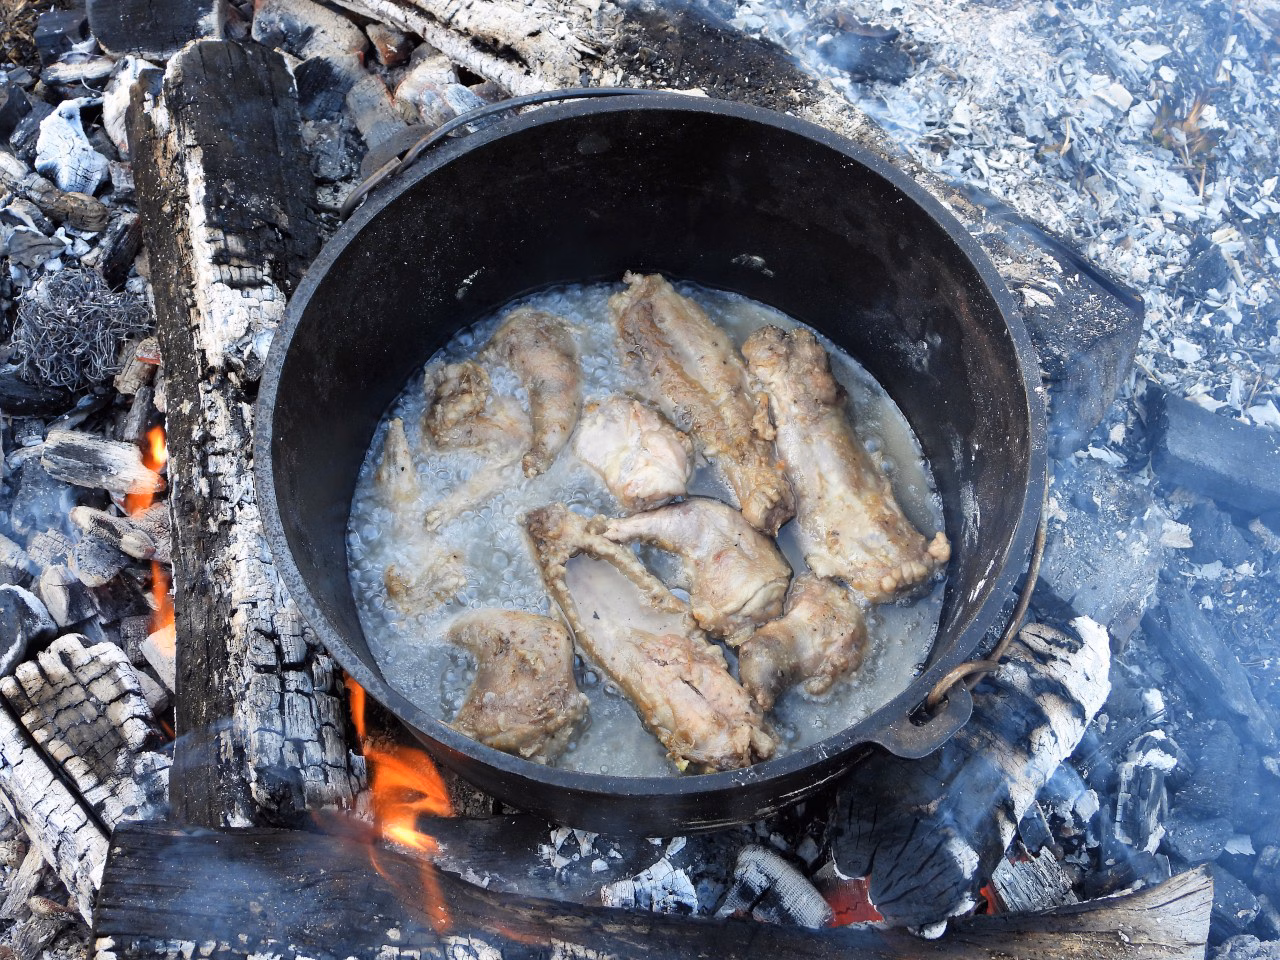
Once your oil is hot enough to make a pinch of flour bubble and sizzle, gently add the squirrel to the pot. Cover the pot with the lid and fry the pieces for six to eight minutes or until the surfaces are crisp and golden brown. Flip the squirrel pieces, return the lid to the pot and repeat until both sides are done. Remove the squirrel from the pot and set aside.
Add the remaining cup of flour to the oil to make a roux. Continuously stir the roux until it takes on a golden-brown color, about eight to10 minutes.
Add the chopped onions and continue cooking until the onions have softened, about another five minutes. Again, stir the roux constantly to prevent it from burning at this point.
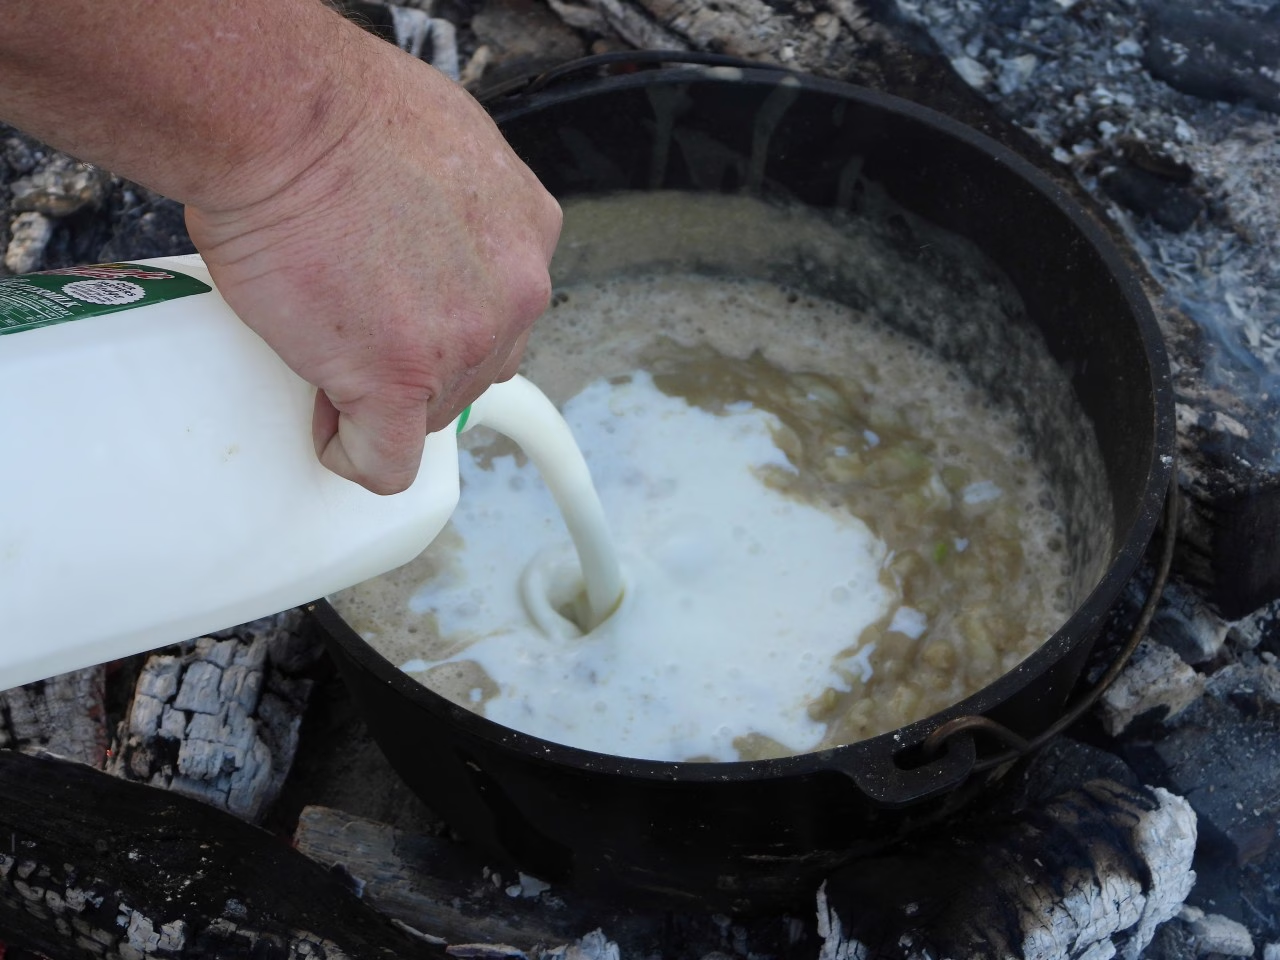
Add the buttermilk and two cups of water. Stir until the gravy begins to thicken. Add additional water as needed if the gravy is too thick. It needs to be thin at this point, just thick enough to coat the back of a spoon. Test for seasoning and add additional salt and pepper to taste.
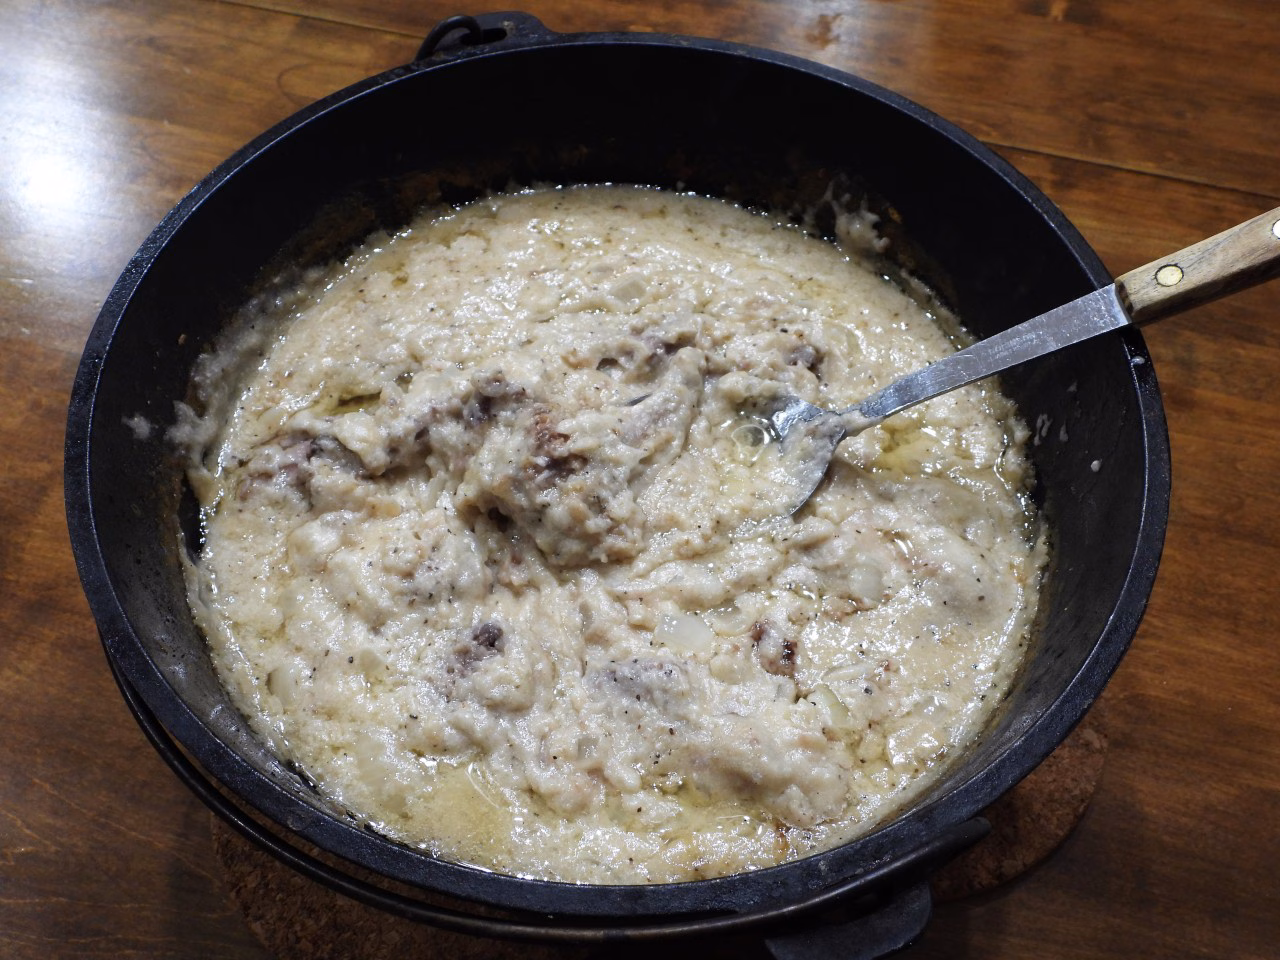
Return the squirrel pieces to the pot, nestling them down into the onion gravy. Place the lid on the Dutch oven. Add six to eight coals or burning charcoal briquets to the top of the lid and allow the squirrel to simmer for 30 to 45 minutes until the meat is tender.
For stovetop preparation, over medium heat, complete the steps above up to adding the squirrel back to the gravy. Once the squirrel is in the gravy, cover the pot and place it into a preheated 300-degree oven for 30 to 45 minutes or until the meat is tender.
Try Out More Recipes with NSSF’s Game Meat Cooking Series
3 Easy Pheasant Dinners Ready in 30 Minutes or Less
By: Jeff Benda
As a wild game chef and full-time recipe developer living in North Dakota, pheasant shows up in our kitchen a lot. I cook for my wife and 10-year-old daughter, and my two biggest critics are looking for dishes that are mouthwatering and save-worthy. They are the kind that are "You should make this for us again next week" good. The following pheasant recipes are ones I keep coming back to because they are flavorful, foolproof and realistic for everyday life.
These are fun upgrades from that old pheasant and cream-of-mushroom soup in a slow cooker recipe your grandma made. They'll make cooking pheasant for dinner anything but boring. And all of them can be on the table in 30 minutes or less, making them the perfect option for a quick weeknight wild game dinner to feed your family or friends.
Quick and Crispy Fried Pheasant Fritters
On busy weeknights, dinner needs to land somewhere between wholesome and fast without a stop at the drive-thru. This recipe turns a couple of pheasant breasts into a golden, pan-fried treat that cooks in minutes, so you can squeeze in a sit-down family dinner on a tight schedule.
The diced pheasant is mixed with mozzarella, eggs and a touch of flour and cornstarch, creating fritters that fry up crisp on the outside with a soft, flavorful center. The batter comes together in one bowl without complicated steps or culinary gymnastics. It can even be made up to a day ahead to make life even easier. Serve them with the quick aioli or tuck them into hamburger buns for a grab-and-go option.
1 celery stalk, shredded using the grater attachment of a food processor or mandoline
1 tablespoon minced garlic
1 tablespoon freshly squeezed lemon juice
¼ teaspoon kosher salt
⅛ teaspoon black pepper
⅛ teaspoon onion powder
⅛ teaspoon celery seed
Instructions
Make the Fritters
In a large mixing bowl, add the pheasant, mozzarella, eggs, mayonnaise, flour, cornstarch, dill, salt and black pepper and stir together until well combined. You can make the fritters right away, but if you have time, cover the bowl with a lid or plastic wrap and refrigerate for 2 hours or up to overnight. This will give the pheasant more time to marinade, so you end up with fritters that are juicier and more flavorful.
Line a rimmed baking sheet with paper towels. In a large nonstick frying pan over medium heat, heat the olive oil. Working in batches, drop six 1-tablespoon portions of the pheasant batter into the pan. Use a spoon or spatula to flatten into 2-inch disks. Fry for 2 to 3 minutes per side until the bottom turns golden brown and the internal temperature reaches 160 degrees F using an instant-read meat thermometer.
Transfer cooked fritters to a paper towel-lined baking sheet. Repeat with the remaining batter, adding more olive oil as needed. Serve immediately.
Make the Garlic Aioli
In a medium mixing bowl, whisk together the mayonnaise, shredded celery, minced garlic, lemon juice, salt, black pepper, onion powder and celery seed.
Serve the garlic aioli with the fritters or store it in an airtight container in the refrigerator for up to 3 days.
Easy Pheasant Pesto Pasta
This hassle-free pheasant pasta has saved many an evening between our daughter's piano lesson and gymnastics. Built around quick-cooking pheasant breast, a creamy sauce and bright basil pesto, it comes together in just 25 minutes - after a short brine - to ensure the lean meat stays juicy.
I'll admit that based on our usual dinner plates, my daughter and I could easily be mistaken for committed carnivores. Left to our own devices, most meals would involve some form of grilled or pan-seared meat with a side of mashed potatoes. That's exactly why this pheasant recipe includes both asparagus and basil pesto. My wife frequently reminds me that green vegetables deserve equal billing at the table, not just honorary garnish status.
Ingredients Needed
6 ounces fettuccine or spaghetti noodles
2 boneless, skinless pheasant breasts from 1 bird
¾ teaspoon kosher salt, divided
¼ teaspoon black pepper, divided
⅛ teaspoon garlic powder
⅛ teaspoon onion powder
2 tablespoons olive oil, divided
6 ounces asparagus, ends trimmed and cut into 2-inch pieces
1-½ cups heavy whipping cream
2 tablespoons basil pesto
Instructions
Dissolve 2 tablespoons of salt in 1 quart of cool water in a container large enough to hold the brine and the pheasant breasts. Submerge the pheasant completely in the brine. Cover and refrigerate for 30 minutes or up to 4 hours. Remove the pheasant and pat dry with paper towels before cooking.
Cook pasta
In a large pot of salted boiling water, cook according to the package instructions for about 12 minutes. While pasta is cooking, proceed with the recipe, then add the drained cooked pasta to the sauce in the last step.
Cook pheasant
While the pasta is cooking, season pheasant breasts on both sides with ½ teaspoon salt, ⅛ teaspoon black pepper, garlic powder and onion powder. Heat a large skillet over medium-high heat with 1 tablespoon olive oil. When oil is hot, add pheasant and sauté until fully cooked through (2 minutes per side). Remove from the pan and rest 5 minutes, then slice into bite-sized pieces.
Sauté asparagus
While the pheasant is resting, add the remaining 1 tablespoon of olive oil to the same skillet with the asparagus pieces. Sauté, stirring occasionally, for 2- to 3-minutes or until tender.
Make the sauce
Add heavy whipping cream, bring to a simmer over medium heat and cook 3 minutes, stirring occasionally. Stir in basil pesto, then add cooked pheasant and cook 2 minutes. Season sauce with remaining ¼ teaspoon salt and ⅛ teaspoon black pepper.
Golden Pheasant Curry
This mild, family-friendly curry features pheasant simmered in a creamy tomato-and-coconut-milk sauce infused with aromatic spices, all coming together in less than 30 minutes. The spice mix includes curry powder and turmeric to create the signature "golden" color. Since all of my wild game recipes are tested and approved by my Minnesota-born wife and 10-year-old daughter, the spice level stays mild. For you, that means kids will happily ask for seconds instead of reaching for emergency peanut butter sandwiches.
Serve this pheasant curry over basmati rice. The rice quickly absorbs the rich, velvety sauce, so be generous, so you create a little pool of sauce that will be begging to be scooped up with soft pieces of buttery garlic naan.
Ingredients Needed
1-½ pounds pheasant breast (from 2 birds), cut into 1-inch pieces
3 tablespoons avocado oil or olive oil, divided
kosher salt
black pepper
1-½ tablespoons mild curry powder
1 tablespoon ground coriander
2 teaspoons ground cumin
1 teaspoon paprika
½ teaspoon turmeric
½ teaspoon sugar
1 large yellow onion, diced
2 teaspoons minced garlic
2 teaspoons minced fresh ginger
1 cup chicken broth
1-5-ounce can diced tomatoes
1-5-ounce can of coconut milk
2 tablespoons tomato paste
2 cups fresh spinach
⅛ teaspoon crushed red pepper flakes (optional)
Instructions
Place the pheasant meat in a bowl. Sprinkle with ½ teaspoon salt and ¼ teaspoon black pepper, then toss until all pieces are evenly coated.
In a separate small bowl, combine 1 teaspoon salt, ½ teaspoon black pepper, the curry powder, ground coriander, ground cumin, paprika, turmeric and sugar. Set aside.
Add oil to a large skillet over medium-high heat. Add pheasant and sauté until the meat is no longer pink on the outside, about 4 minutes. You don't have to cook it all the way through at this point. Transfer pheasant meat to a plate.
To the same skillet, add onion and sauté for about 3 minutes over medium heat.
Add garlic and ginger and cook for 1 minute, then stir in ½ of the seasoning mix and cook for 1 minute more.
Stir in chicken broth, diced tomatoes, coconut milk and tomato paste. Simmer for 10 minutes, stirring often.
Now stir in spinach, cooked pheasant and the remaining ½ of the seasoning mix and simmer for 2 more minutes.
Sprinkle with crushed red pepper if so desired and serve over cooked white rice.
Discover more of Jeff Benda's recipes for wild game at Wild Game & Fish.
About the Author
Jeff Benda is based in Fargo, North Dakota, where he is an avid outdoorsman, hunter, angler and family man. He spent 25 years in the restaurant industry and ran a catering business. He now focuses his time as an outdoor writer and running his food blog wildgameandfish.com where he provides achievable wild game and fish recipes designed to build confidence for new cooks and inspire everyone to elevate their cooking.
Beyond the Rifle: Essential Gear for a Successful Prairie Dog Hunt
When most shooters think about prairie dog hunting, their minds go straight to rifles, scopes, and a pile of ammo. But ask any seasoned “dogger,” and they’ll tell you—success in the field often comes down to the gear you bring besides your firearm. From hearing protection and shooting mats to portable benches and wind gauges, these extras can transform a hot, dusty day into an efficient and enjoyable hunt. In this article, we’ll cover the must-have ancillary gear that keeps you shooting comfortably and accurately all day long. And if you’re looking for deep dives into the best rifles, optics, and cartridges for prairie dog hunting, be sure to check out the full Prairie Dog Rifle, Optics & Ammo Guide from StepOutside.org.
By Bob Robb
Comfort and Communication in the Field
There are several items besides rifles, ammo, and optics that will make your day afield more fun. First and foremost, you need to communicate with the others in your shooting party, so electronic hearing protection is the ticket. That way you keep your ears safe and are able to talk to everyone in the group. You will also want excellent eye protection, preferably those that sit off your face a little to prevent fogging, as much for the shooting part as for protection from the blowing grit, sand and dust you’ll find in prairie dog country.
Reading the Wind and Cleaning Your Rifle
A little wind gauge can help you dope the wind and get a feeling for where you have to hold the crosshairs for different wind speeds. A complete gun cleaning kit with cleaning rods, brushes, jags and patches for each caliber is important, too. Taking a little time on high-volume shoots to clean the barrel several times a day is a good idea, as is completely cleaning the rifle at day’s end.
Get Low: Shooting Mats, Bipods, and Tripods
A real bonus is a shooting mat if you’re going to shoot prone, a common shooting position for prairie dogs. They’re also a little kinder on your butt if you like to shoot from the sitting position. While this isn’t optimum for long-range shooting, it’s great added practice for big-game hunting. I bring along bipod (which you’ll also need for prone shooting) or tripod shooting sticks and do quite a bit of firing from the sitting position, as it’s a position I find myself using a lot on spot-and-stalk hunts in the fall.
Portable Benches and Shooting Rests
On a really active town, you’ll often be set up in the same place for quite a bit of time, and this is where portable shooting benches are a great tool. These portable benches allow you to emulate your range's permanently installed sitting benchrests back home, greatly improve visibility and aid in accurate shooting. There are several on the market—some are mediocre, others pretty deluxe and some downright creative—and any one of them is better than shooting prone for an entire day. Another one of their benefits is that once you’ve worn out an area, the bench can be easily moved to the next viable spot.
Sandbags, Rests, and Shooting Vises
For prone and bench shooting, you’re going to need a variety of sandbags and shooting bags. Squeezing a small sandbag under the buttstock while shooting prone (and with a bipod on the front end), allows you to make tiny elevation changes without fussing with your scope. Larger sandbags placed on the hood of a pickup, a boulder or a shooting bench add stability to the front of rifles not wearing a bipod and protect those rifles at the same time. Bench shooters also tend to favor shooting vises. They usually have some sort of protective material the fore-end will rest against, some swing side to side, and most will have some sort of knob arrangement for elevation adjustments.
Plan Like a Pro: Sun, Snacks, and Safety
In all likelihood you’ll also be out away from the conveniences of a human-populated town quite a ways, so be prepared for anything and everything. On hot summer days on the plains, the sun can be brutal. Protect yourself with a good hat, sunscreen, polarized sunglasses, lightweight pants, and a long-sleeved shirt. If it’s not too windy, setting up an umbrella or tarp so you can get out of the sun for a spell is worth its weight in gold. That’s where you can set up a couple of folding chairs and a cooler filled with ice, cold nonalcoholic beverages, and snacks. Folding chairs are perfect for spotters as well. Fill up your gas tank, have plenty of liquids and food, bring a basic first aid kit, some bug spray and rain gear and always watch the weather. One year in Wyoming my group was forced to make a run for it when a tornado sprang up seemingly out of nowhere and raced right towards us!
That was almost as exciting as the shooting. On that particular day, four of us tallied how much ammo we had burned in the eight hours before we had to head for the hills. I still have my log book, and the number was 1,087. That’s impressive and why prairie dog shooting is something you should seriously consider giving a try.
Special thanks to StepOutside.org for providing this insightful content.You may also be interested in:
https://www.letsgohunting.org/resources/articles/hunter-education/how-to-use-natural-clues-to-read-the-wind/
https://www.letsgohunting.org/resources/articles/small-game/prairie-dog-hunting-an-exciting-adventure-in-the-wild/
By Robert Sadowski
The market for night-vision and thermal optics stays red hot, but red dots at LPVOs remain in the mix this year.
Optics such as night vision and thermal are being offered by more brands, making these exotic optics more accessible to hunters. Some price points are still at nose-bleed heights because they are so feature rich the process is more like buying a computer than a scope. Other brands make owning thermal and night-vision optics for mere mortals easier. There still is a steep entry price, but once you go thermal it’s hard to go back. There is also no reason why you can’t put your pistol-buying customer in a red-dot optic. This year there are red-dot reflex sights at all price points. Enclosed emitter red dots (red-dot optics sealed from the elements) are making inroads with models at lower price points. LPVOs (Low-Powered Variable Optics) continue to be a strong presence in the riflescope market. Here are the details.
Apex Optics
Apex Optics' new VAPOR 1-4x22mm variable-zoom PRISM sight (SRP: $699-$799) is the first variable-zoom prism sight available on the market. Designed for tactical situations, competition, or anyone looking for cutting-edge innovation, precision, and durability, the VAPOR offers effortless zoom from 1X through 4X with a simple turn of the front zoom ring, similar to a traditional riflescope. It is compatible with Picatinny mounts for easy integration into any AR-style platform. A six-position illuminated, glass-etched reticle with off settings between each brightness level is built into a 30mm one-piece aircraft-grade aluminum tube. The new ION 1x25mm red-dot sight (SRP: $350) is designed for defensive and tactical pistol or AR platforms. The ION uses the RMSc footprint, so it is compatible with all RMSc mounts. Features include AutoSleep and JOLT-AWAKE technologies that automatically power down during inactivity and instantly reactivate with motion. There are 10 brightness settings, including two for night-vision use. Reticle options include a 6 MOA dot or a selectable three-position MRX reticle. The Edge BLACK 1-10×24 LPVO (SRP: $1,800) is now fully assembled and quality controlled in the USA and offers the same unparalleled performance as the original Japanese-made Edge 1-10×24.
Check these out on: apexoptics.co
Barska
The NVD35 Night Vision Adapter (SRP: $549.99) transforms nearly any riflescope into a highly efficient night-vision system by attaching seamlessly to the ocular lens of most riflescopes. Equipped with a 1024×768 pixel OLED display, the NVD35 boasts a digital zoom range from 1X to 5X. The easy-attachment mechanism allows for quick installation and removal, making it highly adaptable for a variety of shooting scenarios.
Check these out on: barska.com
Burris
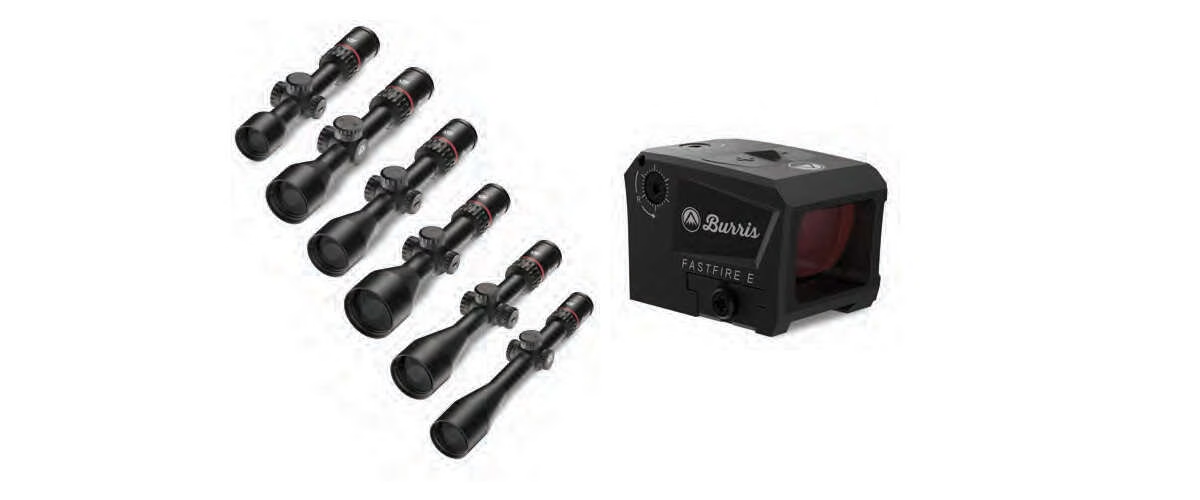
The Fullfield riflescope line has a 50-plus-year reputation of proven performance, and for this year the Fullfield line has been redesigned with five magnification ranges and a variety of reticle options. The proprietary 4X zoom system offers performance in a compact scope, combined with simple Plex or more advanced MOA and BDC-based reticle options. The optional Burris Knob Synergy turrets elevate performance. Six new Fullfield models include a 2-8x35mm, 2.5-10x42mm, 3-12x42mm, 3-12x56mm, 4-16x50mm, and 6-24x50mm (SRP: $192-$600). Whether you're a hunter or a long-range shooter, the Fullfield lines offer value and performance.
The new FastFire E (SRP: $420) is an enclosed emitter red-dot optic designed for a variety of platforms and to ensure reliable performance in any environmental conditions. Built with an aluminum body, the FastFire E is constantly powered on with a 60,000-hour battery life from one CR2032 battery that juices a red or green 3.5 MOA dot.
Check these out on: burrisoptics.com
C&H Precision
The new COMP MAX (SRP: $339.95) is an open-emitter red dot with a viewing window larger than other red dots. The COMP MAX is purpose-built for competition, duty, or concealed carry. It has the same footprint as the RMR and features a multiple reticle with a 2 MOA dot, 30 MOA circle—or both. The new EDC-EN (SRP: $275) is an enclosed emitter red dot to protect against dirt, dust, and debris interfering with the emitter. Powered up 50,000 hours, the EDC-EN features shake-to-wake technology, so it instantly comes on and powers off after five minutes of inactivity. It uses a RMSC footprint for a wide range of compatibility. Red and green dot reticle models are available with multiple reticle choices: 2.5 MOA dot, 34 MOA circle, or both. The HNT-R MAX (SRP: $339.95) is another open emitter red dot with a large viewing window, RMSC footprint, and True Timber camo finish. Add this to your turkey shotgun.
Check these out on: chpws.com
C-More
The RTS3 (SRP: $749) open emitter red dot is a total redesign to maximum performance and reliability. The RTS3 placed first overall at the 2024 USPSA Carry Optics National Championship. It features a large viewing window; is available with either a 3, 6, or 9 MOA dot; has 50,000 hours of battery life; and the footprint is compatible with STS2 and RTS2 mounts. It also has a 30-year warranty.
Check these out on: cmore.com
Crimson Trace
Crimson Trace has evolved two of its best selling products, the Railmaster CMR-201 and CMR-206 Universal Laser Sights. Now both lasers are equipped with aluminum rail clamps to outlast the competition and prevent slipping.
The CMR-201 also features a robust polymer body, brightest allowable 5mw red laser, and externally replaceable 1/3N Li battery. The small footprint fits on a wide range of handguns and rifles. The CMR-206 features a daylight visible 5mw green laser—brightest allowable by law. Both lasers come with two rail fit adapters: universal and GLOCK profile. SRP: $129.99, CMR-201; $239.99, CMR-206.
Check these out on: crimsontrace.com
Eotech
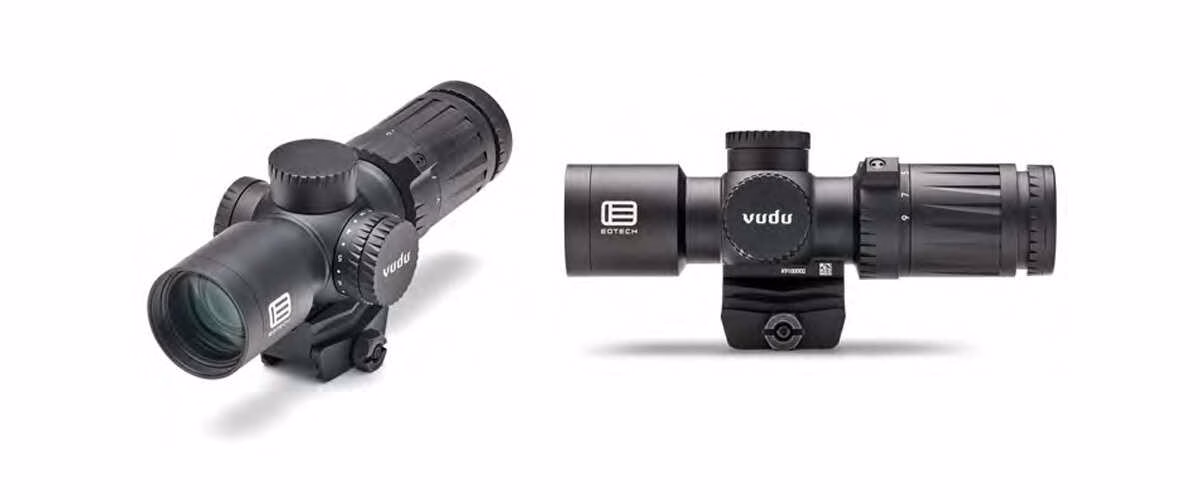
The housing of the super-short Vudu 3-9×32 riflescope is constructed of lightweight aircraft-grade aluminum. This second focal plane design comes in at 6.8 inches and is fog-, water-, and shock-resistant. The turrets offer 1⁄4 MOA adjustments and are both capped for protection. A rotary dial provides an illuminated reticle with 10 brightness settings, and the CR2032 battery provides roughly 300 hours of operation. The unique design provides an integrated base that is also compatible with aftermarket mini-ACOG mounts. For those wanting a non-magnified solution, EOTECH offers a version that includes a ring mount and EFLXTM that can be mounted to the front tube section. It can be positioned at the top or at 45-degree offsets for close or moving targets.
Check these out on: eotechinc.com
GPO
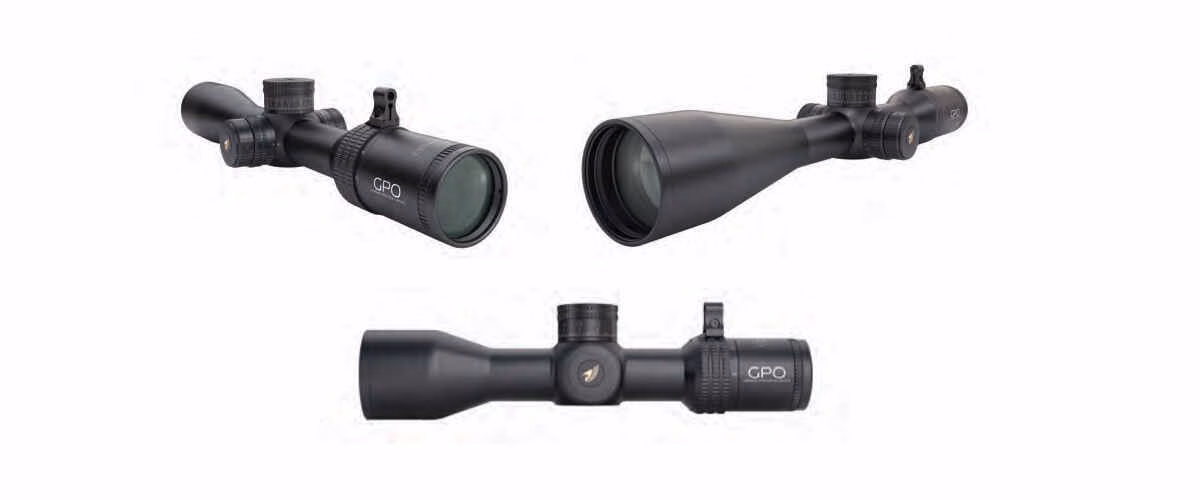
It shouldn’t take retailers long to figure out the new CENTURI lines of riflescopes offers all the features shooters demand at an affordable price. The CENTURI 4-16x44i FFP Super Compact riflescope (SRP: $519.99) has a small footprint at just 9.9 inches long. It weighs a mere 20 ounces. Features include a first-focal plane milliradian reticle illuminated with GPO iControl technology, .1 milliradian turrets that lock, and an innovative “in-cap” zero-stop locking function. Other models in the CENTURI family include a 2.5-15x44i (SRP: $619.99), 2.5-15x50i (SRP: $619.99), and 3-18x44i (SRP: $619.99). All feature a 6X zoom magnification and are built on 30mm tubes.
Check these out on: gpo-usa.com
Hawke Optics
The new Vantage IR 1-4x20mm Turkey Dot riflescope (SRP: $239) is designed for turkey hunting with features like a full Mossy Oak camo finish and Turkey Dot illuminated reticle. It comes with flip-up covers, honeycomb sun shade, and removable zoom throw lever. The new XB30 FFP crossbow scope (SRP: $219.99) with an FFP reticle is a first for crossbow optics. The XB30 FFP SR illuminated reticle keeps you on target at any magnification.
Check these out on: us.hawkeoptics.com
Hi-Lux Optics
The Malcolm Long Rifle Telescope Gen II (SRP: $799) blends period-correct aesthetics and modern performance. The Malcolm comes equipped with a 6X magnification eyepiece, sliding dovetail mounts, a 5-inch extended sunshade for 30-inch barrels, and parallax adjustment from 10 yards to infinity. If your customer's rifle barrel has both front and rear sight dovetails, you should be able to mount this scope without any drilling or tapping. Dove mounts are compatible with Uberti, Shiloh, Perdesoli, and Chiappa rifles.
Check these out on: hi-luxoptics.com
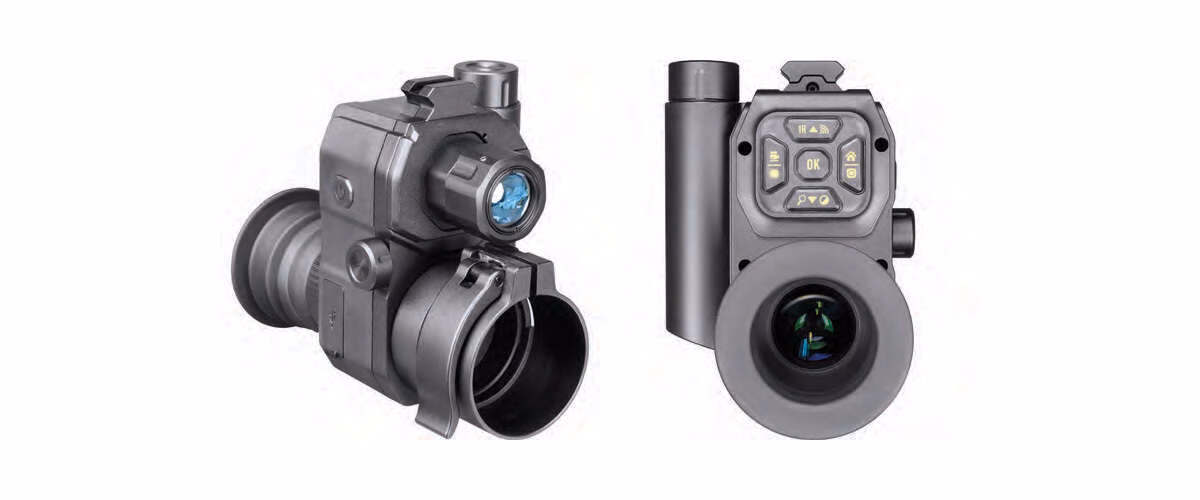
Pulsar
Engineered with cutting-edge technology and precision craftsmanship, Thermion digital thermal riflescopes deliver clarity and precision to ensure success in any low-light environment. For 2025, Pulsar adds three models to the Thermion line: 2 LRF XP60, 2 LRF XG60, and 2LRF XL60. All feature a video recorder, AMOLED 2560×2560 display type and resolution, a 60mm objective lens, and 64 Gb of built-in memory. The units can detect images up to 2,000 meters (2,800 for the 2LRF XL60), and the included remote control allows hunters to to adjust settings and make precise shots without ever losing sight of the target.
Check these out on: pulsarnv.com
Riton
The new 5 Primal 3-18×50 Crossover Scope (SRP: $999.99) is designed to be just as useful on the 1,000-yard range as in the backcountry. Built on a 34mm tube, the Primal features .1 mil capped turrets and the popular Long-Range Hunter (LRH) first-focal plane (FFP) reticle with a Christmas-tree style set-up. The new 3 Tactix 3X Magnifier (SRP: $249.99) adds magnification to 1X dot-style optics when you need it—and stays out of the way when you don’t. The push-button design flips the magnifier out of the way to run a dot without additional magnification. Features include two mounting height configurations and a choice between a dot-only or a circle-dot reticle. Pair the 1 Tactix ARD 2 (SRP: $229.99) with the 3 Tactix 3X magnifier for a versatile package.
Check these out on: ritonoptics.com
Umarex
The Umarex RDS8 (SRP: $39.99) stands for Red Dot Sight 8 and is compatible with various airguns, airsoft guns, and imaged paintball training equipment. The RDS8 is a compact, lightweight red dot sight with an 8 MOA reticle with two brightness levels. A Picatinny universal mount is included so it can adapt to a variety of other air-powered platforms. The OR/MOS Adapter Plates (SRP: $20) are now available for select air-powered Walther PDP and Glock models in airgun, airsoft, and paintball variants. The plates come in the most popular mounting footprints for Trijicon, Vortex, Leupold, and C-More.
Check these out on: umarexusa.com
U.S. Optics
The new RISE Red Dot Sight (SRP: $279.99) is a high-performance reflex sight equipped with a 3 MOA red dot, 10 brightness settings (including night vision), and a durable aluminum housing. It is compatible with the Leupold DeltaPoint Pro footprint, and is ideal for pistols, shotguns, and rifles with tactical, sporting, and home-defense applications.
Check these out on: usoptics.com
Winchester Supreme Optics
The new line of value-focused riflescopes includes six models: 6-18x50mm SF Illuminated Reticle (SRP: $344.99), 4-12x44mm SF (SRP: $241.99), 3-9x40mm (SRP: $206.99), 3.5-10x50mm (SRP: $218.99), 2-7x32mm (SRP: $144.99), and 1-4x24mm Illuminated Reticle (SRP: $264.99). Features include premium lens multi-coated with Winchester WINcoat to transmit the maximum amount of low dusk or dawn light to your eye. All scopes use second focal plane (SFP) reticles and fast-focus eyepieces.
Check these out on: worldofwinchester.com
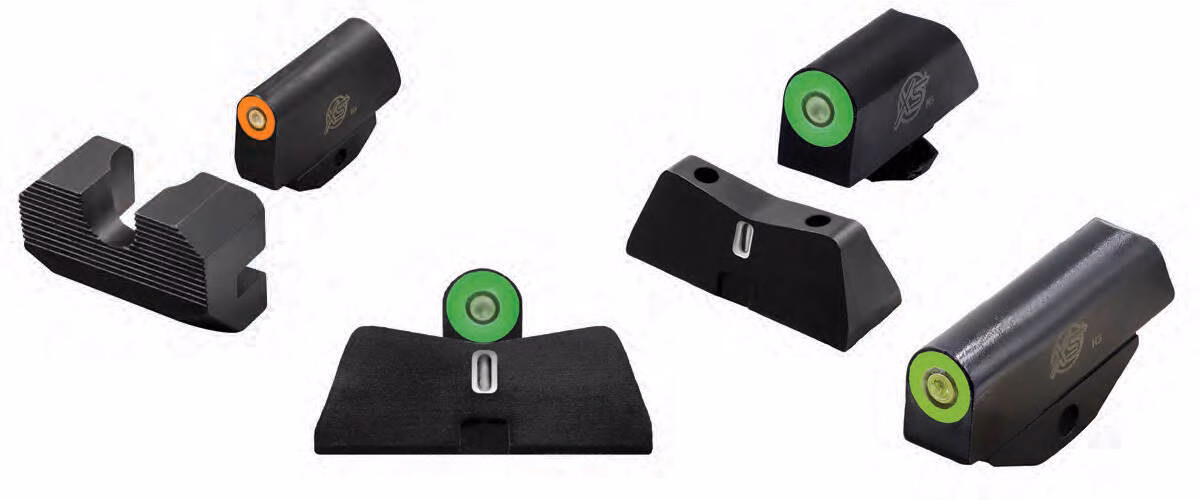
XS Sights
The DXT2 PRO Series night sights are designed for self-defense. This improved Big Dot line offers increased durability and corrosion resistance due to the upgraded tritium lamps and BlackNitride surface finish. The PRO Series is also the first XS Big Dot available with a green glow dot front sight that delivers high contrast in bright light while glowing extremely bright in low light.
The DXT2 PRO Series sights offer the same exceptional benefits of the original XS Big Dots with a large, easy-to-see tritium front sight with dual-illumination technology for high visibility in low light and a rear, tritium stripe for fast and easy vertical alignment. The overall design and sheer size of the dot at 0.188 inch drives focus to the front sight for lightning-fast target acquisition. The sights will fit selected models from Glock, SIG Sauer, Springfield Armory, Smith & Wesson, and FN. SRP: $153.
XS Sights is also offering new, pre-drilled front sights, featuring a self-illuminating tritium Glow Dot, for S&W K-Frame, L-Frame, J-Frame and Ruger SP101 revolvers. The dual-illuminated front sight has a self-luminous tritium vial surrounded by XS’ proprietary photoluminescent Glow Dot that absorbs ambient light to glow in low light. The pairing ensures the front sight will glow brightly in low light and contrast well in bright light conditions.
While the Standard dot sets come with a front sight only, the Minimalist sets come with a front sight and serrated, anti-glare, non-tritium rear sight. It is designed to be as minimalistic as possible while driving focus to the front sight.
Check these out on: xssights.com
X-Vision Optics
The latest to the FLEX thermal optic lines is the all-new compact TR2 (SRP: $3,499.99) with features like detection range up to 1,700 yards, 1-4X magnification, a large 2.56-inch display screen, customizable color-palette and reticle selections, and a quick-release Picatinny mount.
You may also be interested in:
https://www.letsgoshooting.org/resources/articles/firearms/new-handguns-coming-to-stores-in-2025/